


Dyeing your hair at home can be a fun and cost-effective way to refresh your look or experiment with a new color. However, if not done properly, DIY hair dyeing can lead to damage, breakage, and uneven results. In this comprehensive guide, we will walk you through the step-by-step process of safely dyeing your hair at home, ensuring a flawless finish without compromising the health of your locks. From preparation to aftercare, every step is important in achieving vibrant, beautiful hair that lasts.
The Benefits of Dyeing Your Hair at Home
Before diving into the how-to, it’s important to understand why many people choose to dye their hair at home. Some of the key benefits include:
- Cost-Effective: Salon visits can be expensive, especially for regular color touch-ups. Dyeing your hair at home allows you to save money while still achieving professional-looking results.
- Convenience: You can dye your hair on your own schedule, without needing to book an appointment or take time off work. It’s ideal for people with busy lifestyles.
- Creative Control: Doing it yourself gives you complete control over the color and technique. You can experiment with different shades and try new trends without a stylist’s assistance.
While there are many reasons to dye your hair at home, it’s essential to approach the process carefully to avoid common mistakes and damage.
Step 1: Choose the Right Hair Dye
Choosing the right hair dye is the first step in ensuring your hair is dyed safely and effectively. There are several types of hair dye available, and it’s important to select the one that best suits your hair type, the color you’re aiming for, and your personal preferences.
1.1 Permanent Hair Dye
Permanent hair dye provides long-lasting color and is ideal for covering gray hair or making dramatic color changes. However, it contains ammonia or peroxide, which can be harsh on the hair if used incorrectly. Make sure to choose a dye that’s formulated for your hair type.
1.2 Semi-Permanent Hair Dye
If you’re looking for a less harsh option, semi-permanent hair dye is a great choice. It doesn’t contain ammonia or peroxide, and the color fades after about 6-12 washes, making it a good option for beginners or those experimenting with color.
1.3 Temporary Hair Dye
Temporary hair dye is the least damaging and can be easily washed out after a few washes. It’s ideal if you want to try a bold color for a short time, like a vibrant pink or blue, without making a long-term commitment.
1.4 Color-Depositing Conditioners
These are non-permanent products that gradually add color to your hair with every use. They are gentle on the hair and can be a great way to enhance your natural color or maintain hair dye between salon visits.
Step 2: Gather the Necessary Tools
Proper preparation is key to achieving a flawless, damage-free hair dyeing experience. To dye your hair at home, you’ll need the following tools:
- Hair Dye Kit: Choose a dye kit that includes all the necessary components, such as the dye, developer, and gloves.
- Plastic or Glass Bowl and Brush: Use a non-metallic bowl to mix the dye, and a brush to apply it evenly to your hair.
- Gloves: Protect your hands from stains and irritation by wearing latex or nitrile gloves.
- Old Towel or Cape: To avoid staining your clothes, use an old towel or hair dyeing cape to cover your shoulders.
- Sectioning Clips: These will help you divide your hair into sections for easy and even application.
- Comb: A wide-tooth comb will help you detangle your hair before dyeing and ensure the dye is evenly distributed.
- Timer: Set a timer according to the instructions to avoid leaving the dye in for too long.
Step 3: Perform a Patch Test
Before applying the dye all over your hair, it’s crucial to perform a patch test. This is a safety precaution to ensure you don’t have an allergic reaction to the dye.
How to do a Patch Test:
- Apply a small amount of the dye mixture to a discreet area on your skin, such as the inside of your elbow or behind your ear.
- Leave the dye on for the amount of time specified in the instructions (usually 48 hours).
- If you experience any redness, itching, swelling, or irritation, do not proceed with dyeing your hair.
This test is essential even if you’ve dyed your hair before, as allergies can develop over time.
Step 4: Prepare Your Hair
Proper preparation of your hair will ensure that the dye is applied evenly and lasts longer. Here are the steps to take before applying hair dye:
4.1 Start with Clean, Dry Hair
Most hair dyeing products work best when applied to dry, unwashed hair. However, avoid washing your hair immediately before dyeing. Natural oils on your scalp help protect your skin from irritation caused by the dye.

4.2 Detangle Your Hair
Before applying dye, use a wide-tooth comb to remove any tangles and knots. This will ensure an even application and prevent the dye from missing certain areas.
4.3 Protect Your Skin
To prevent dye from staining your skin, apply a thin layer of petroleum jelly or a thick moisturizer along your hairline, ears, and neck.
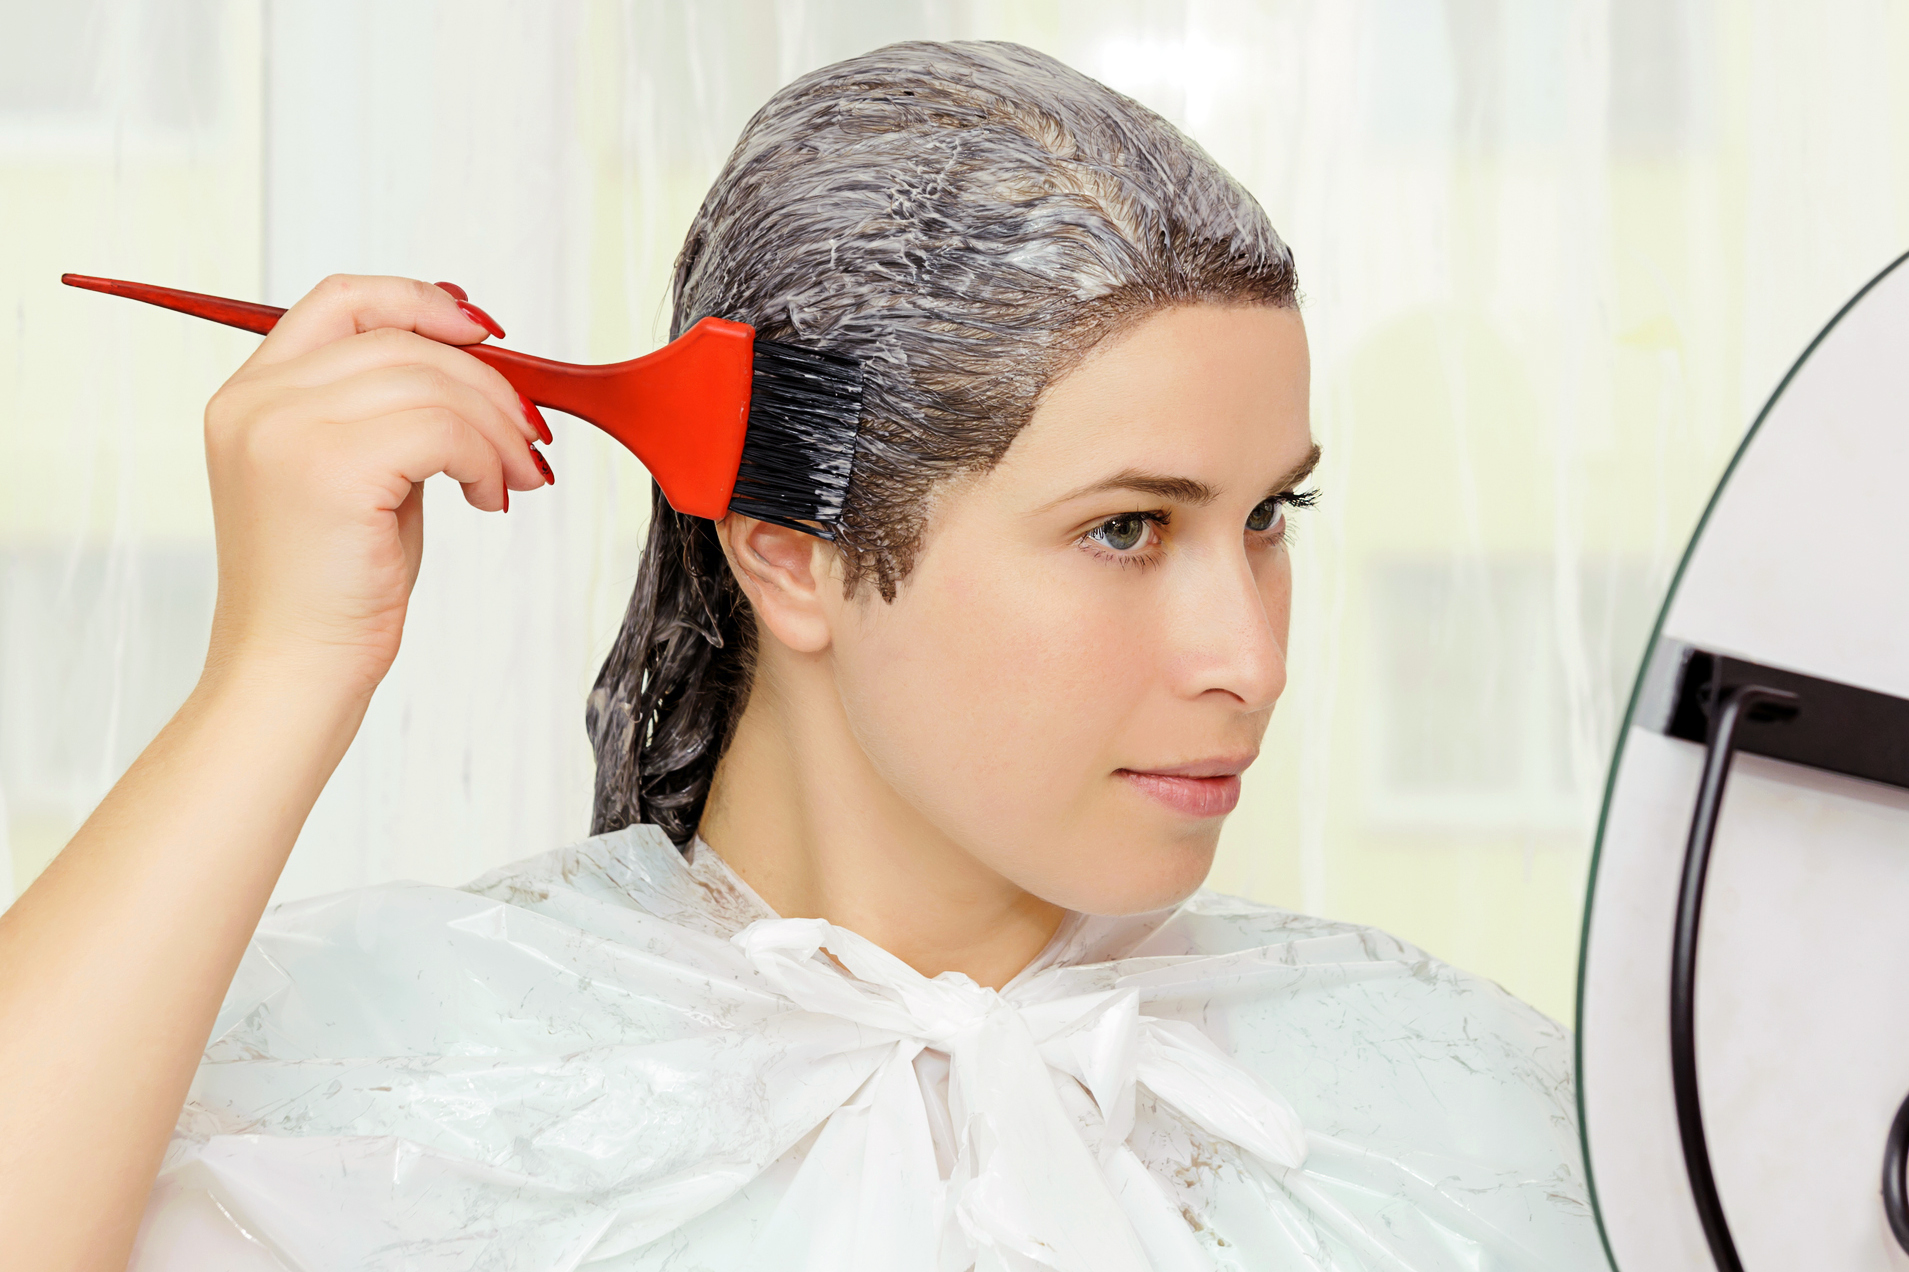
Step 5: Apply the Dye
Now that your hair and skin are prepared, it’s time to apply the dye. Here’s how to do it effectively:
5.1 Mix the Dye
Follow the instructions carefully to mix the dye and developer in the provided bowl. Some kits may require you to mix the products immediately before use, while others may allow you to mix in advance.
5.2 Section Your Hair
Divide your hair into four sections using sectioning clips. This will help you apply the dye evenly, ensuring no area is missed. Start by applying the dye to the roots, and then work your way down to the ends.
5.3 Apply the Dye
Using a dye brush, begin applying the dye to your roots, working in small sections. Once the roots are covered, move to the rest of the hair and apply the dye in a downward motion. Be sure to saturate every strand of hair for even coverage.
5.4 Massage the Dye In
After applying the dye to your hair, gently massage it in with your fingers to ensure even distribution. You may also use a comb to comb through your hair to spread the dye.
Step 6: Let the Dye Process
Once the dye is applied, you’ll need to let it process for the time specified in the instructions. This is typically anywhere from 20 to 40 minutes, depending on the dye and the color you want to achieve.
6.1 Set a Timer
To avoid over-processing or under-processing your hair, set a timer according to the instructions. Do not leave the dye on for longer than recommended.
6.2 Check the Color
While the dye is processing, you can periodically check the color by wiping a small section of hair with a damp cloth. This will help you gauge whether it’s ready to rinse out.
Step 7: Rinse and Condition
Once the processing time is up, it’s time to rinse the dye out of your hair. Here’s how:
7.1 Rinse with Cool Water
Rinse your hair thoroughly with cool water to remove the dye. Cool water helps to close the hair cuticles, which can prevent color from fading prematurely.
7.2 Apply the Conditioner
Most hair dye kits come with a conditioner designed to lock in moisture and enhance the color. Apply the conditioner generously, and leave it in for the recommended amount of time before rinsing.
7.3 Dry Your Hair
After rinsing, gently pat your hair with a towel to remove excess water. Avoid vigorous towel-drying, as this can lead to breakage. Let your hair air dry or use a blow dryer on a low heat setting.
Step 8: Maintain Healthy, Vibrant Hair
Now that you’ve successfully dyed your hair, it’s essential to maintain the health of your locks. Here are some tips to keep your hair vibrant and shiny:
8.1 Use Color-Protecting Products
To extend the life of your color, use color-safe shampoos and conditioners. These products are designed to protect your hair from fading and maintain its vibrancy.
8.2 Avoid Heat Styling
Limit the use of heat styling tools such as flat irons and curling irons. If you must use them, always apply a heat protectant beforehand.
8.3 Deep Condition Regularly
Hair dye can sometimes leave your hair feeling dry or damaged. Use a deep conditioning treatment once a week to restore moisture and nourishment.
Conclusion
Dyeing your hair at home can be a rewarding and enjoyable experience when done properly. By following the steps outlined in this guide, you can achieve vibrant, beautiful color without damaging your hair. Remember to choose the right dye, prepare your hair properly, and follow the instructions carefully to ensure a flawless finish. With a little practice and the right tools, you’ll be able to achieve salon-quality results right in the comfort of your own home.


