


Introduction
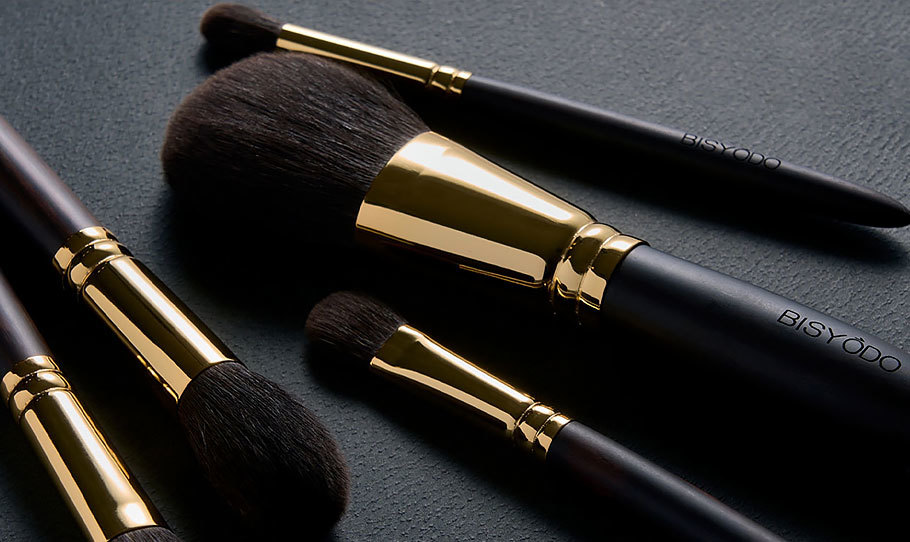
A flawless, long-lasting makeup look is every beauty lover’s dream, but achieving it requires more than just a good foundation or the right eyeshadow palette. The secret to a perfect, lasting makeup look lies in the proper use of makeup tools. From foundation brushes to beauty sponges and eyeliner brushes, each tool plays a crucial role in ensuring your makeup stays fresh and flawless throughout the day.
In this guide, we’ll walk you through the essential makeup tools you need for every step of your routine—from morning application to touch-ups in the evening. We’ll also provide expert tips and tricks to help you use each tool to its full potential, ensuring your makeup stays in place from dawn to dusk.
1. The Base: Perfecting Your Canvas with the Right Tools
Morning Routine: Starting Fresh with Primer and Foundation
A long-lasting makeup look begins with a smooth, hydrated base. The right foundation and primer can help your makeup adhere better, last longer, and create a flawless finish. Here’s how to start:
Primer Tool: Using a Silicone Brush or Clean Hands
- Purpose: Primers create a smooth base, filling in pores and minimizing imperfections.
- Tip: Use a silicone makeup brush or your fingers to apply primer. The brush helps distribute the product evenly, while your fingers warm it up, allowing it to sink into the skin for maximum adhesion.
Foundation Brush vs. Beauty Sponge: Which One is Right for You?
- Foundation Brush: A flat foundation brush is ideal for a smooth, airbrushed finish. It works well with liquid or cream foundations, creating a full-coverage look.
- Expert Tip: Use short, downward strokes to apply foundation and ensure it blends seamlessly with your skin.
- Beauty Sponge: A damp beauty sponge, like the iconic Beauty Blender, is perfect for those who want a dewy, natural finish. The sponge absorbs excess product and ensures a smooth, even application.
- Expert Tip: Dampen the sponge with water before use for a smoother finish. Tap the sponge lightly on your skin for an airbrushed look, rather than rubbing.
Setting Your Foundation:
- Use a kabuki brush or a large powder brush to apply a setting powder and lock in your foundation. Lightly dust the powder over your T-zone, where you’re likely to get oily throughout the day.
2. Sculpting & Shaping: Defining Your Features
Contouring and Highlighting with Precision Tools
After setting your foundation, it’s time to add dimension to your face. Contouring and highlighting can transform your features, making them look more sculpted. Here’s how to use the right tools:
Contour Brush: Precision and Definition
- Purpose: Contouring requires a brush with a dense, angled shape to apply and blend product into the hollows of your cheeks, along the jawline, and on your temples.
- Expert Tip: When applying contour, use a light hand to avoid harsh lines. Blend the contour in upward strokes to avoid dragging the product down.
Highlighting Brush: A Soft, Tapered Tool
- Purpose: To achieve a luminous glow, use a small, fluffy tapered brush for precision. Apply highlight on your cheekbones, brow bones, and down the bridge of your nose.
- Expert Tip: Focus on the highest points of your face for a natural, radiant glow. Be sure to blend the highlighter well for a seamless finish.
3. Eyes: Creating Definition with the Right Tools
Eye Shadow: Brushes for Perfect Blending and Pigmentation
Eyeshadow Brushes: The Key to a Flawless Eye Look
- Flat Shader Brush: A flat brush is essential for packing on eyeshadow, especially when working with shimmer or metallic shades. Use this to apply shadow on the eyelid for vibrant, even color.
- Expert Tip: Tap off excess product before applying to avoid fallout.
- Blending Brush: A fluffy, soft brush helps blend eyeshadows seamlessly into each other. Whether you’re doing a soft smoky eye or a dramatic look, blending is key for a professional finish.
- Expert Tip: Use windshield wiper motions to blend your shadows back and forth.
Precision Crease Brush: Adding Depth and Definition
- Purpose: A small, round, dense brush is perfect for adding definition to the crease of your eyelid.
- Expert Tip: Apply your darkest shade in the crease using a soft, circular motion to add depth, making sure the shadow is evenly distributed and blended.
Smudging Brush: For Smoky Eyes
- Purpose: If you’re creating a smoky eye look, a small, dense smudger brush is your best friend. It’s perfect for blending eyeliner and eyeshadow together for a sultry, smoky effect.
- Expert Tip: After applying your eyeliner, use the smudging brush to gently blend the eyeliner into the eyeshadow for a more dramatic and seamless look.
Mascara: The Final Touch for Defined Lashes
Mascara Wand: Choose the Right Shape for Your Lashes
- Purpose: A curved wand helps lift and curl lashes, while a straight wand adds volume and definition.
- Expert Tip: For volume, wiggle the mascara wand at the base of your lashes and move upward. For length, use a light hand and apply a thin coat of mascara.

4. Lips: Making Your Lips Pop and Stay in Place
Lip Liner: Defining and Shaping the Lips
Lip Liner Brush vs. Pencil: Precision and Definition
- Lip Liner Brush: If you’re using a lip cream or liquid lipstick, a lip liner brush can be the key to sharp, defined lips. A small, angled lip brush allows for precise application of liner around the edges of your lips.
- Expert Tip: Use your lip liner to define the edges of your lips first, then fill in with your lipstick. This helps prevent feathering and ensures long-lasting color.
Lip Brush: Perfect for Liquid Lipsticks
Lip Brush Tool: Achieving a Flawless Finish
- Purpose: For precise application, especially with liquid or gloss formulas, a lip brush offers the control needed to avoid messy lines.
- Expert Tip: Use a synthetic lip brush for liquid lipsticks and matte formulas. It provides a smooth application and helps you avoid wasting product.
5. Setting Everything in Place: How to Keep Your Makeup Fresh All Day
Setting Spray: Locking in Your Look for Hours
Mist and Fix: The Magic of Setting Sprays
- Purpose: A setting spray is the final step to ensure your makeup stays fresh and lasts all day. It helps melt the layers of makeup into one seamless finish while keeping everything in place.
- Expert Tip: Hold the bottle at arm’s length and spray in a T or X motion over your face to set your makeup. Allow it to dry naturally for a fresh, long-lasting finish.
6. Touch-Up Tools for Maintaining Your Look Throughout the Day
Blotting Papers: Shine-Free Skin Without the Mess
Blotting Paper: The Secret to Oil Control
- Purpose: Blotting papers are great for absorbing excess oil without disturbing your makeup. They’re a must-have for midday touch-ups.
- Expert Tip: Gently press the blotting paper onto your T-zone, concentrating on areas that get oily. Avoid rubbing, as it can disturb your makeup.
Mini Makeup Brushes: On-the-Go Fixes
Mini Brushes for Quick Fixes
- Purpose: A small travel-sized powder brush and mini eyeshadow brush are lifesavers when you need to touch up while on the go.
- Expert Tip: Keep a small kabuki brush in your bag for powder touch-ups, and use the mini eyeshadow brush to add a quick pop of color to your eyes.
Conclusion: Mastering the Art of Long-Lasting Makeup
Achieving a flawless, long-lasting makeup look doesn’t just depend on the products you use—it also depends on the tools you rely on to apply and blend those products. From prepping your skin with primer to setting your makeup with a mist, each step requires specific tools to ensure you get the best results.
By using the right tools and applying the correct techniques, you can create a seamless, durable makeup look that lasts from morning to night. So, next time you’re getting ready, make sure to incorporate these expert tips and tools into your routine—and enjoy a beautiful, long-lasting makeup look all day long!


