


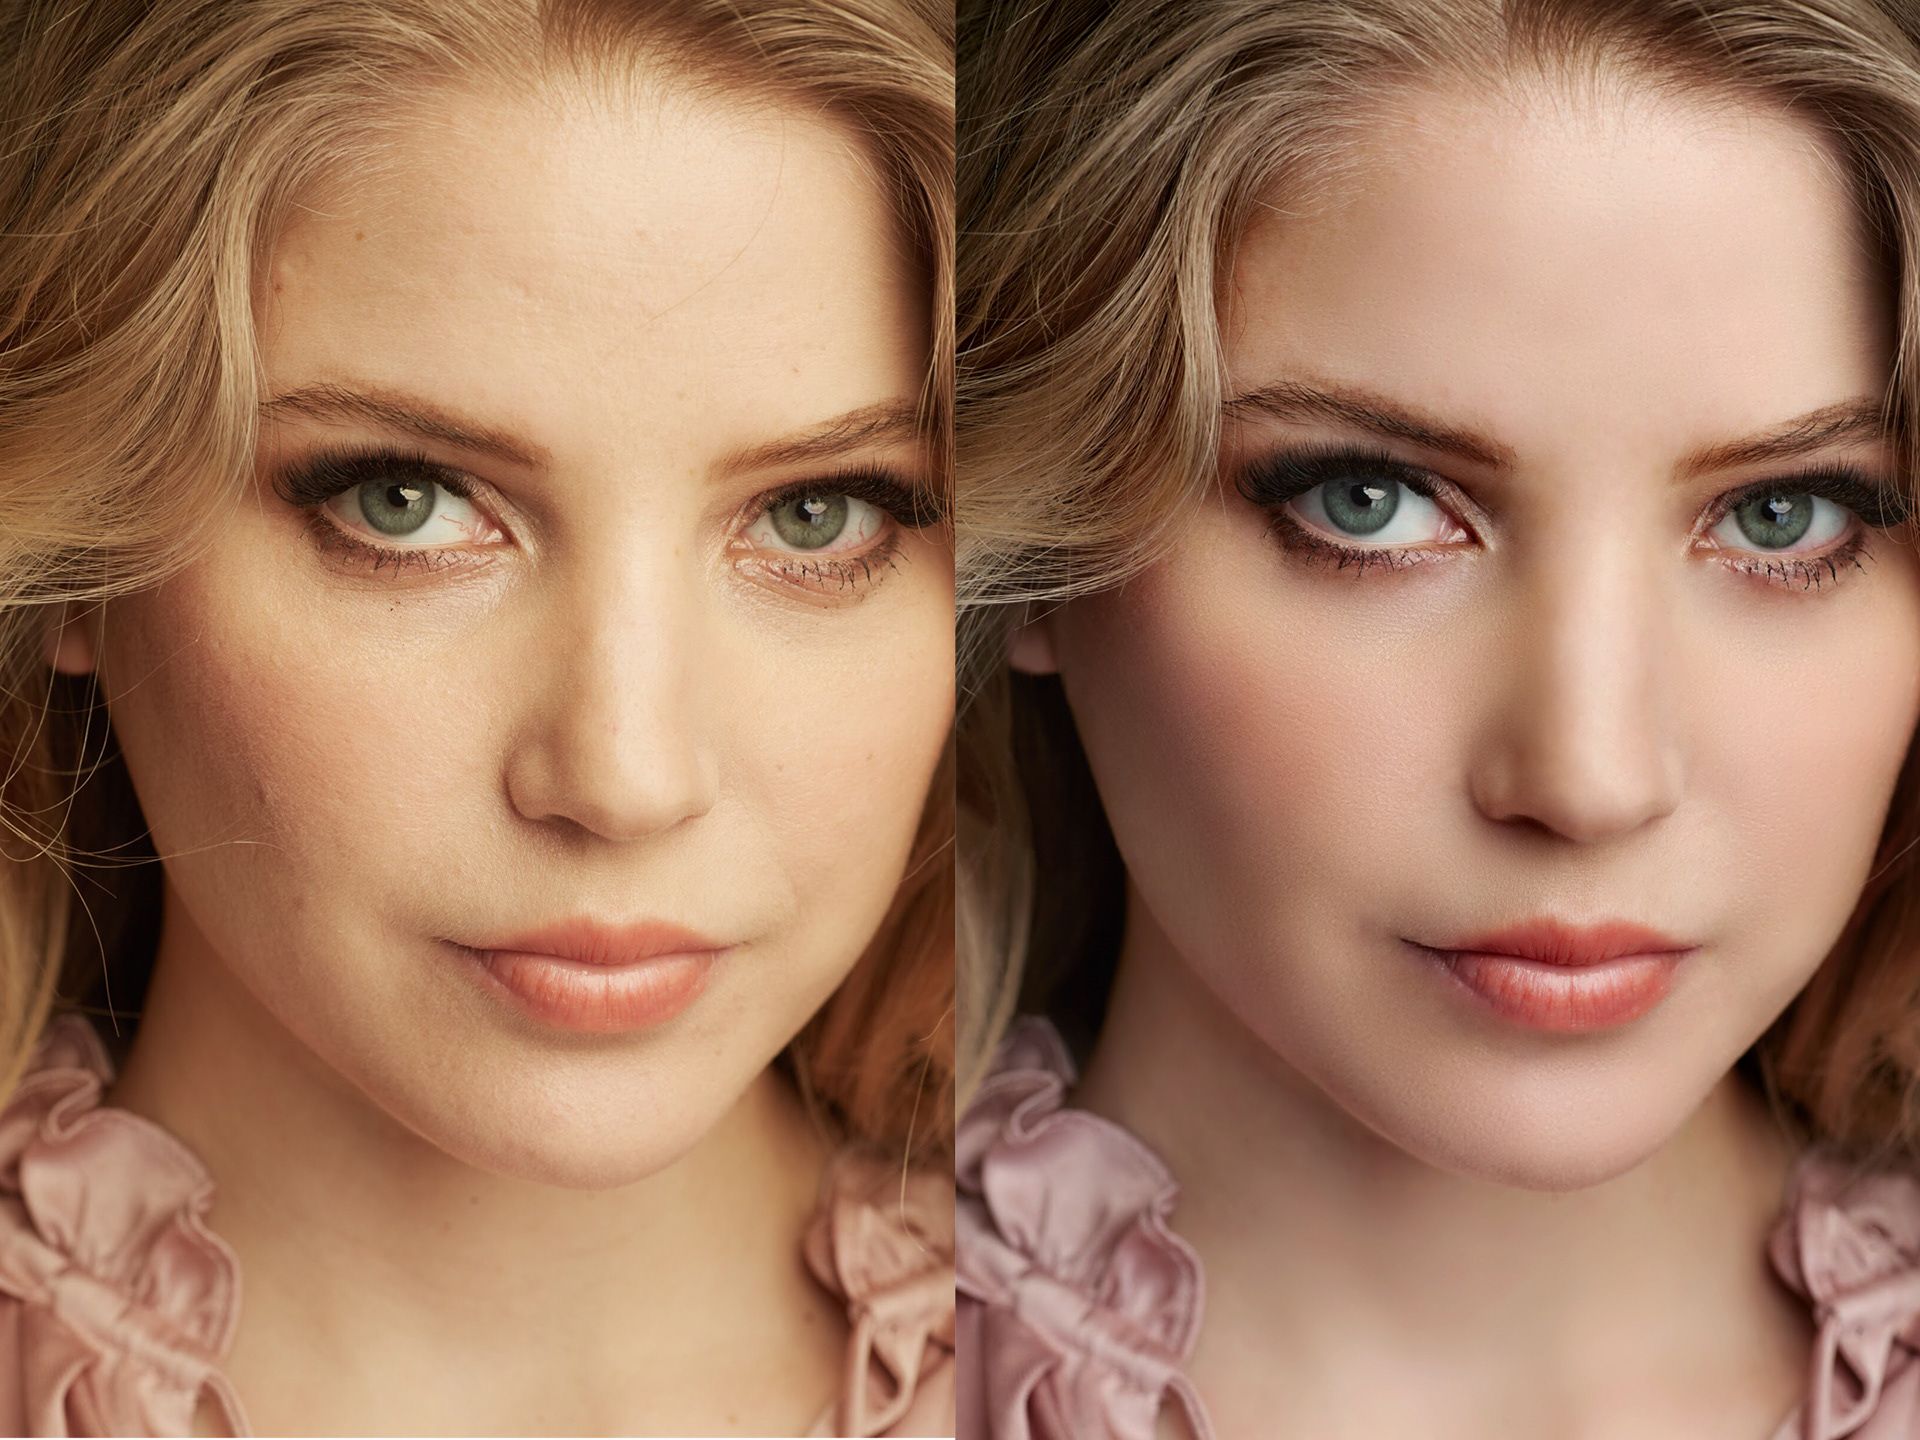
The no-makeup makeup look has become the gold standard of modern beauty—an aesthetic that whispers rather than shouts, enhances rather than transforms, and celebrates skin rather than masking it. But despite its name, this look is far from effortless. In fact, it requires a strategic approach to spot concealing, feather blending, and tone correction to create the illusion of naturally flawless skin.
In 2025, the trend continues to dominate runways, workspaces, and social media because it aligns with a deeper cultural movement: authenticity. People want to look like themselves—just a little more rested, radiant, and refined. Mastering this technique means understanding the delicate balance between coverage and transparency, structure and softness, enhancement and invisibility.
This article dives into the art and science of creating the perfect no-makeup makeup complexion, dissecting the techniques that beauty experts swear by.
1. What Does “No-Makeup Makeup” Really Mean?
No-makeup makeup is not about hiding your features—it’s about optimizing them. The goal is to create a complexion that looks like your skin on its best day, without obvious traces of foundation, heavy powders, or harsh contour lines.
Key Characteristics of the Look
- Skin texture still visible
- Minimal product layers
- Seamless transitions between tones
- Strategic glow, not forced shine
- Enhanced natural features without dramatic alteration
Instead of relying on full coverage products, this approach uses pinpoint concealing, ultra-soft blending, and subtle tone balancing to elevate your natural beauty.
In other words, it’s makeup that feels believable.
2. Spot Concealing: The Secret Weapon of the Look
Spot concealing is the foundation of the no-makeup makeup technique. Rather than applying a full layer of product over your entire face, you identify specific imperfections and correct them individually.
2.1 Why Spot Concealing Works Better Than Foundation
- Preserves natural skin texture
- Prevents cakiness
- Avoids buildup in fine lines
- Looks more authentic in natural light
- Makes makeup appear undetectable
This method is especially effective when the goal is “skin, but better.”
2.2 How to Spot Conceal Correctly
Step 1: Prep the Skin
A hydrated base ensures that product melts seamlessly into the skin. Choose:
- Lightweight gel moisturizers
- Ceramide-rich creams for dry skin
- Minimal oily formulas to prevent slippage
Step 2: Choose a High-Pigment, Thin-Texture Concealer
The ideal concealer should be:
- Highly concentrated
- Flexible
- Non-drying
- Buildable
Think “serum-based pigmented drops” rather than thick cream.
Step 3: Apply Only to the Spots That Need It
Use:
- A micro brush
- A tiny detail sponge
- Or your fingertips
Apply to:
- Blemishes
- Red areas around the nose
- Hyperpigmentation dots
- Small shadows under the eyes
Step 4: Let the Product Set Before Blending
This helps coverage stick without sheer loss.
Step 5: Feather Blend the Edges
Using a brush or finger, diffusing outward creates the illusion of seamless skin.
Spot concealing is precise, subtle, and transformative.
3. Feather Blending: The Technique That Makes Makeup Invisible
Feather blending is the art of softening the edges of makeup until you can no longer tell where your skin ends and the product begins. This technique is essential for the no-makeup makeup effect.
3.1 What Makes Feather Blending So Important?
Without delicate blending, even the best concealer can look like makeup. Feathering:
- Removes harsh lines
- Smooths tone transitions
- Keeps skin looking naturally dimensional
- Prevents patchiness throughout the day
3.2 How to Feather Blend Like a Pro
Technique 1: Micro-Tapping
Tap only the edges of the concealer, not the center, to avoid pulling pigment off the target area.
Technique 2: Use Sheer Pressure
Let the brush barely touch your skin—“cloud pressure”—to diffuse product without lifting it.
Technique 3: Body-Heat Fusion
Use the warmth of your fingertip to melt the concealer into your skin, especially under the eyes or around the nose.
Technique 4: Mist and Blend
A light spritz of facial mist before blending helps create the airbrushed finish associated with the no-makeup makeup style.
Technique 5: Work in Layers, Never in One Pass
Two ultra-thin blended layers look more natural than one thick application.
Feather blending is the difference between “wearing makeup” and “looking flawless.”
4. Tone Correction: Your Shortcut to Balanced, Radiant Skin
Tone correction focuses on neutralizing uneven color without resorting to full face foundation. Instead of covering everything, we gently balance areas of discoloration so the skin looks naturally even.
4.1 Understanding Skin Tone vs. Skin Undertone
Mastering tone correction requires recognizing:
- Tone: depth of the skin (light, medium, deep)
- Undertone: the color beneath the surface (cool, warm, neutral)
Correcting tone means addressing unwanted darkness or redness, not masking your undertone.
4.2 Key Tone Correction Areas
Under-Eye Darkness
Best corrected with:
- Peach for blue-purple shadows
- Orange tones for deeper under-eyes
- Soft apricot for light-neutral skin
Redness Around the Nose
Green isn’t always necessary. Use:
- Yellow-based concealers
- Neutral beige correctors
- Sheer skin tints
Pigmentation Spots
Use pinpoint peach or almond correctors only where needed.
Dullness
Apply a sheer, radiant skin tint:
- On high points of the face
- With a stippling brush
- In minimal amounts
4.3 Tone Correction Rules for No-Makeup Makeup
- Less product = more real skin
- Correct only what is distracting
- Keep the original undertone visible
- Layer transparent textures for glow
Tone correction produces that “natural brightness” people associate with good skin—without heavy coverage.
5. Putting It All Together: The Step-by-Step No-Makeup Makeup Routine
Here is the complete process used by editorial makeup artists, adapted for anyone aiming for perfect minimalism.
Step 1: Prep the skin
- Hydrating moisturizer
- Lightweight sunscreen
- Optional: soft-focus primer
Step 2: Tone correct
- Under-eyes
- Nose corners
- Chin shadows
- Pigmentation patches
Step 3: Spot conceal
- Only the areas that draw attention
- Use micro precision tools
- Let product set before blending
Step 4: Feather blend
- Tap the edges
- Use nearly invisible pressure
- Allow skin texture to remain visible
Step 5: Optional enhancements
- Brow gel for soft structure
- Lip tint for subtle color
- Cream blush for barely-there flush
- Balm highlighter for natural glow
Step 6: Set selectively
- Use micro-powdering only where needed:
- Sides of nose
- Smile lines
- Between brows
Avoid all-over powder to maintain skin realism.
The final effect: polished but natural, luminous but not shiny, perfected but believable.
6. Why the No-Makeup Makeup Trend Endures
2025’s beauty culture favors looks that celebrate authenticity. This approach resonates because it:
- Highlights natural features
- Works across all age groups
- Doesn’t require heavy technique
- Prioritizes skin health
- Complements both casual and professional settings
Most importantly, it gives people the confidence to feel good in their own skin—not just the one they paint on.
Conclusion: Is No-Makeup Makeup the Highest Expression of Modern Beauty?
Yes—because it reflects a new definition of beauty. One rooted in softness, transparency, and self-acceptance. Mastering spot concealing, feather blending, and tone correction means learning to enhance rather than hide, to refine rather than reshape.
The illusion of effortless skin isn’t effortless—but when executed well, it just might be the most empowering makeup technique of all.


