A smoky eye is a timeless and versatile makeup look that can be as subtle or dramatic as you desire. From sultry evenings out to high-fashion runway trends, the smoky eye can transform your look with a seductive and smoky allure. Whether you’re a beginner or an advanced makeup enthusiast, mastering the smoky eye can elevate your makeup game and make your eyes pop.
In this tutorial, we’ll walk you through everything you need to know to create a flawless smoky eye look—from the basics of the technique to pro-level tips. We’ll cover product recommendations, step-by-step instructions, and tricks for making your smoky eye last all night.
Understanding the Smoky Eye Look
A smoky eye is characterized by its smudged, sultry, and blurred effect, where the eyeshadow seamlessly transitions from a dark shade on the eyelid to lighter tones on the brow bone. The key to achieving this look lies in blending the shadows to create a seamless gradient that gives the illusion of depth and mystery.
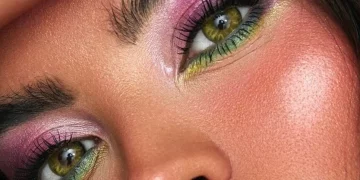
Traditionally, smoky eyes feature dark, neutral shades like black, brown, and gray, but modern variations of the look can incorporate bold pops of color. While the classic black smoky eye is a staple, experimenting with different hues like burgundy, deep blue, or even metallics can add a fresh twist to this iconic style.
Step 1: Preparing Your Eyes
Before you start applying eyeshadow, it’s crucial to prep your eyes properly to ensure that your smoky eye look stays put throughout the day or night. Here’s how to get started:
1.1 Prime Your Lids
Priming your eyelids helps to create a smooth base and enhances the longevity of your eyeshadow. An eyeshadow primer will prevent creasing and ensure that the pigment stays vibrant.
- Recommended Products: Urban Decay Eyeshadow Primer Potion, Too Faced Shadow Insurance
- How to Apply: Apply a thin layer of primer over the entire eyelid, focusing on the crease and extending slightly above the lid.
1.2 Set the Primer
After applying primer, it’s a good idea to set it with a neutral eyeshadow to prevent it from getting too sticky, especially if you plan to layer dark shades on top. Opt for a matte shade that’s similar to your skin tone.
- Recommended Products: NYX Matte Shadow in Skin Tone, MAC Blank Type
1.3 Define Your Brows
A well-defined brow frames the eyes and can elevate your smoky eye look. You don’t need to go overboard—just fill in any sparse areas and shape your brows for a polished finish.
- Recommended Products: Anastasia Beverly Hills Brow Wiz, Benefit Precisely, My Brow Pencil
- How to Apply: Use light strokes to fill in the brows and use a spoolie to blend out any harsh lines.
Step 2: Choosing the Right Shades
The choice of shades is critical when it comes to a smoky eye. While you can go for classic black or gray, other colors like deep brown, navy, or even jewel tones can work beautifully for creating the same sultry effect.
2.1 The Classic Smoky Eye Palette
For a traditional smoky eye, you’ll need a combination of matte, shimmer, and satin finishes in the following shades:
- Dark shade for the lid (black, charcoal, or deep brown)
- Medium shade for the crease (dark brown or gray)
- Light shade for the inner corner (champagne, beige, or ivory)
- Highlighter for the brow bone (matte or shimmer highlight)
2.2 Choosing Your Smoky Eye Shades
- Traditional Smoky Eye: Black, gray, or deep brown
- Colorful Smoky Eye: Deep navy, plum, burgundy, or green
- Metallic Smoky Eye: Bronze, gold, copper, or silver
When choosing your shades, it’s important to balance light and dark tones to achieve a seamless blend. The darker shades should be concentrated on the lid and outer corners, while the lighter shades should be applied to the inner corner and brow bone.
Step 3: Applying the Eyeshadow
Now that your lids are prepped and you’ve chosen your shades, it’s time to start applying the eyeshadow. Here’s how to do it step-by-step:
3.1 Step One: Apply the Dark Shade
Start by applying the darkest shade you’ve chosen to the entire lid, focusing on the area closest to the lashes. Use a flat brush for precision and press the product into the lid, gradually building up the intensity. Don’t worry about blending just yet.
- How to Apply: Use a flat shader brush to apply the darkest shade along the lash line and onto the lid. Press the eyeshadow in place, starting from the lash line and working upwards slightly.
3.2 Step Two: Blend the Dark Shade into the Crease
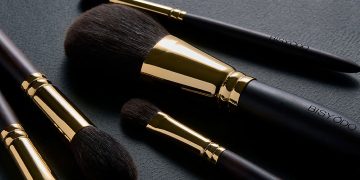
Now, take a medium shade and use a fluffy blending brush to diffuse the dark color into the crease. This step is crucial for creating that soft, gradient effect that’s characteristic of the smoky eye.
- How to Apply: Using a fluffy blending brush, sweep the medium shade back and forth in the crease to diffuse the dark color. Don’t be afraid to blend for several minutes to achieve that smoky, soft edge.
3.3 Step Three: Apply the Lighter Shade to the Inner Corner
Using a small pencil brush, apply a lighter shade to the inner corner of your eyes. This step helps to brighten and open up the eyes, balancing the darkness of the outer corners.
- How to Apply: Dab a light, shimmery eyeshadow in the inner corners of the eyes. Blend it softly towards the center of the lid.
3.4 Step Four: Highlight the Brow Bone
To give your smoky eye an extra lift, apply a highlight shade directly under the brow bone. This will add dimension to your eye makeup and prevent it from looking too heavy.
- How to Apply: Apply a matte or shimmery highlight under the arch of your brow. Use a small, precise brush to avoid applying too much product.

Step 4: Adding Definition with Eyeliner
The smoky eye look is defined by its smudged, smoky eyeliner. While you can opt for a sharp line for a more defined look, a smudged or blurred line creates that signature smoky effect.
4.1 Pencil Eyeliner
For a more dramatic look, use a black or dark brown pencil eyeliner. Apply the eyeliner to the top lash line, and smudge it out with a small pencil brush for that smoky, smudged effect.
- Recommended Products: Urban Decay 24/7 Glide-On Eye Pencil, MAC Smolder
4.2 Gel or Liquid Eyeliner
If you prefer a defined look, you can use a gel or liquid eyeliner to create a sharper line along the lash line. For a more natural look, smudge the liner with a brush or your fingertip.
- Recommended Products: Bobbi Brown Long-Wear Gel Eyeliner, Stila Stay All Day Waterproof Liquid Eyeliner
4.3 Waterline
To complete the smoky effect, apply a dark eyeliner to your lower waterline. This will make the eyes appear more intense and bold.
- How to Apply: Use a pencil liner to carefully line the waterline of your lower lashes.
Step 5: Finishing Touches
Once the eyeshadow and eyeliner are in place, it’s time to add the finishing touches to your smoky eye look.
5.1 Mascara
No smoky eye look is complete without voluminous lashes. Apply several coats of mascara to your upper and lower lashes to enhance the eye makeup.
- Recommended Products: Too Faced Better Than Sex Mascara, L’Oréal Voluminous Lash Paradise
5.2 False Lashes (Optional)
For an extra dramatic effect, consider applying false lashes. Choose lashes that are voluminous but not too long, as they can overpower the smoky eye.
- Recommended Products: Ardell Demi Wispies, Huda Beauty Samantha Lashes
5.3 Touching Up the Lower Lash Line
For a more complete smoky eye, apply a small amount of the darkest eyeshadow along your lower lash line, then blend it out with a small brush for a smudged, smoky effect.
- How to Apply: Use a small pencil brush to apply dark eyeshadow along the lower lash line, smudging it out for a seamless look.
Step 6: Pro Tips for a Flawless Smoky Eye
- Blend, Blend, Blend: The key to a perfect smoky eye is seamless blending. Be patient and take your time to ensure there are no harsh lines.
- Use a Setting Spray: To make sure your smoky eye stays put all night, use a setting spray to lock everything in place.
- Experiment with Color: While black is the classic choice, don’t be afraid to experiment with shades like plum, bronze, or navy for a unique twist on the smoky eye look.
Conclusion
Mastering the smoky eye look is all about practice and patience. Whether you’re aiming for a subtle day look or a bold, dramatic nighttime eye, the smoky eye is a versatile technique that can be tailored to your style. By following the steps and tips outlined above, you’ll be able to create a flawless smoky eye every time. With the right products, technique, and a little practice, your smoky eye will become your go-to look for any occasion.

