


Whether you are preparing for a professional photoshoot, influencer content, or a special event, makeup that looks stunning in real life doesn’t always translate well on camera. Photography, particularly with flash or studio lighting, can highlight imperfections, wash out colors, or make shimmer appear overdone if the technique isn’t precise. Glam makeup for photoshoots requires an understanding of how light interacts with the skin, strategic product choices, and placement that enhances features while minimizing flaws.
This comprehensive guide covers everything you need to know—from selecting flash-friendly products to mastering contour, shimmer, and lip definition—so you can achieve a polished, camera-ready look every time.
1. Why Are Flash-Friendly Products Essential for Photoshoot Glam?
Lighting in photography, especially flash, can dramatically alter the appearance of makeup. Some products reflect light poorly, resulting in uneven texture, shiny spots, or washed-out colors. Choosing the right formula ensures your makeup appears flawless on camera.
● Avoid SPF-Heavy Foundations
- Foundations with high SPF can cause a “white cast” when photographed with flash.
- Opt for medium to full coverage, matte or natural finish foundations that do not contain reflective sunscreen particles.
● Choose Long-Wear, High-Pigment Formulas
- Studio lighting can wash out color.
- Use highly pigmented foundations, blushes, and lipsticks to retain vibrancy.
- Cream-to-powder products often provide the most photogenic finish because they blend seamlessly but stay put.
● Stick to Matte or Subtle Satin Finishes
- Avoid overly dewy formulas on areas prone to flash reflection (forehead, nose, cheeks).
- Controlled satin finishes allow natural glow without glare.
● Concealer for High-Coverage Correction
- Photographs magnify shadows and imperfections.
- Choose a long-wear, full-coverage concealer to hide dark circles, blemishes, and redness.
- Blend seamlessly to avoid cakiness under bright lighting.
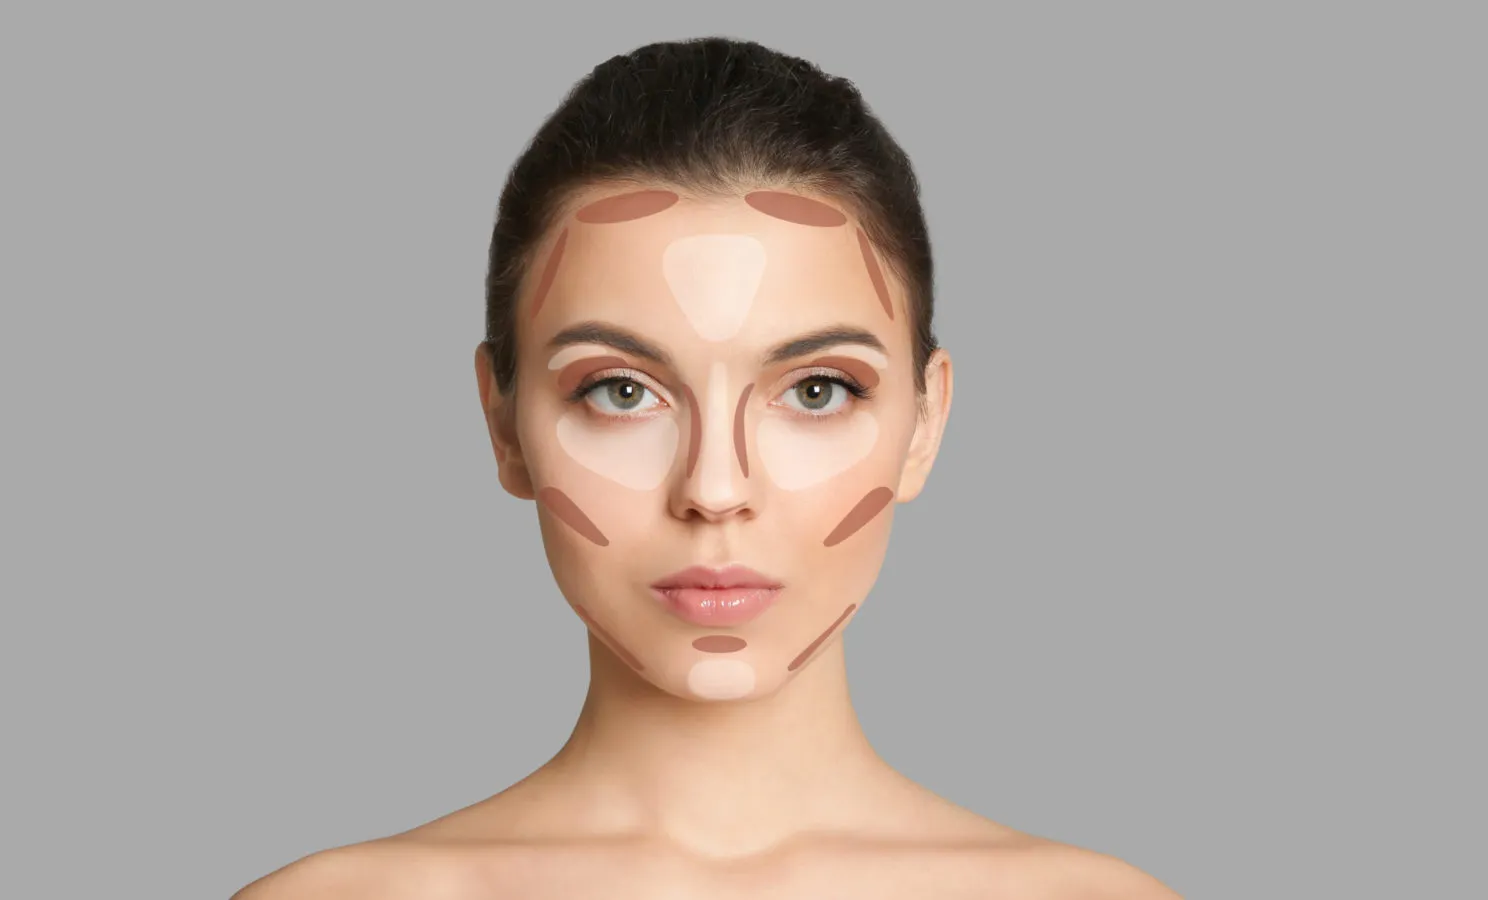
2. How Do You Contour for Photography?
Contouring is one of the most critical steps for photoshoot makeup. Properly placed contour and highlight create dimension, prevent the face from appearing flat, and accentuate features that pop on camera.
● Understand Light and Shadow
- Studio lighting can flatten facial features.
- Contour creates shadows and adds depth for a three-dimensional effect.
● Contour Placement
- Cheekbones: Sweep a matte bronzer or contour powder just below the cheekbone to define structure.
- Jawline: Define along the jaw for a sculpted look.
- Nose: Use light contour on sides to slim appearance.
- Forehead: Apply near hairline if needed to balance light reflection.
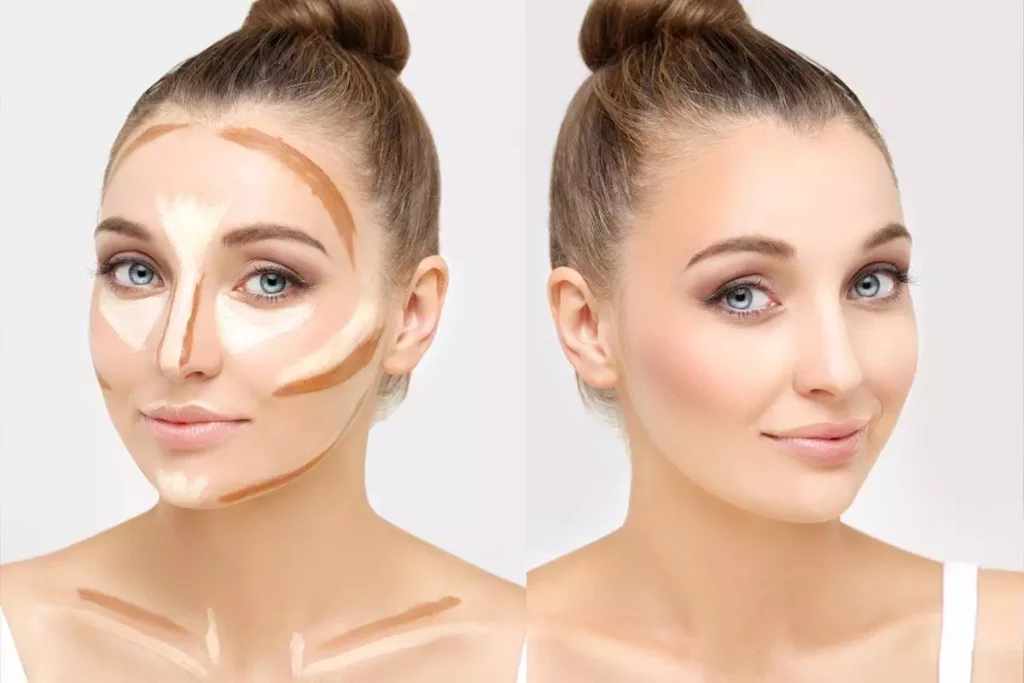
● Highlighting for Photography
- Highlighter should enhance, not overpower.
- Focus on natural glow areas: tops of cheekbones, brow bone, bridge of nose, and Cupid’s bow.
- Avoid glittery highlighters that can appear harsh under flash. Subtle pearl or champagne tones photograph best.
● Blending Is Key
- Overly harsh contour looks unflattering on camera.
- Blend seamlessly to avoid streaks while maintaining structure.
- Use brush types strategically: dense angled brush for contour, fluffy brush for blending, and small tapered brush for precision.
3. Where Should You Place Shimmer for Maximum Photographic Impact?
Shimmer adds dimension and luminosity but can be tricky under bright lights. Overuse may create reflective glare, while underuse can make the skin look flat.
● Eyes
- Apply shimmer on eyelid center to catch light.
- Avoid placing shimmer on inner corners unless it’s subtle—flash can exaggerate brightness.
- Consider a matte transition shade in crease to add depth.
● Cheeks
- Highlight tops of cheekbones lightly.
- Avoid applying shimmer directly on blush—this can create patchiness.
● Nose
- A soft highlight along the bridge works better than shimmery tip application, which can reflect unevenly.
● Lips
- Lip gloss or metallics can look amazing, but apply strategically: center of lips only for dimension.
● Tips
- Cream and powder products can be layered for precise shimmer control.
- Use brushes sparingly; fingertips often provide the most natural finish for cream or liquid shimmers.
4. How Do You Define Lips for Photoshoots?
Lip definition is essential because lips tend to lose impact under bright lights.
● Use Lip Liner
- Outline lips to create a sharp, defined shape.
- Slightly overline if a fuller appearance is desired.
● Choose Long-Wear Lipsticks
- Matte or semi-matte formulas prevent smudging or bleeding.
- Highly pigmented colors retain vibrancy in photos.
● Add Dimension
- Apply slightly lighter or glossy shade at the center to catch light.
- For glam looks, lip gloss can be layered on top for highlights, but avoid all-over reflective gloss that can wash out color.
● Clean Edges
- Concealer around the edges can sharpen lines.
- Use a small brush to perfect edges for a polished, camera-ready finish.
5. Additional Tips for Photoshoot-Ready Glam
● Prep Skin Meticulously
- Hydrate, prime, and address texture.
- Smooth skin ensures makeup sits evenly and photographs beautifully.
● Set Makeup Strategically
- Use translucent powder in T-zone and areas prone to shine.
- Set cream products with corresponding powder for longevity.
- Setting spray ensures makeup stays intact under studio lights.
● Avoid Excessive Glitter
- Even tiny reflective particles can create hotspots under flash.
- Stick to subtle pearl or metallic finishes.
● Test Photos
- Take test shots in similar lighting conditions before final photoshoot.
- Adjust contour, highlight, and lipstick if certain areas appear washed out or overly reflective.
● Keep Essentials Handy
- Blotting papers, setting powder, and lip touch-up products are must-haves for on-set adjustments.
Conclusion
Glam makeup for photoshoots is an art that balances beauty with technical understanding. By selecting flash-friendly products, mastering contour and highlight placement, controlling shimmer, and defining lips strategically, you can create looks that translate perfectly from mirror to camera. Small adjustments—like choosing subtle shimmer, layering cream and powder products, and setting makeup appropriately—can make the difference between ordinary and photogenic results.
With these techniques, your photoshoot glam becomes timeless, polished, and ready for any lighting scenario.


