


Introduction: Understanding the Basics of Contouring
Contouring is one of the most powerful makeup techniques to enhance the natural structure of your face, creating the illusion of higher cheekbones, a slimmer nose, and a more sculpted jawline. While it might seem intimidating at first glance, contouring is actually an accessible technique that can be mastered by anyone, from beginners to makeup artists. When done correctly, contouring can accentuate your features and provide a more defined, polished appearance.
At its core, contouring involves using makeup to create shadows and highlights on the face. The purpose of contouring is not to drastically change your facial features, but rather to enhance and define them. It allows you to emphasize your cheekbones, jawline, and forehead, or slim down areas of the face that you might want to minimize. The art of contouring is all about balancing light and shadow — using darker shades to sculpt, and lighter shades to highlight.
Understanding the basics of contouring is crucial before you dive into the step-by-step process. It’s important to know what tools to use, what products work best, and how to apply them for a flawless, natural finish. In this article, we will break down the essential steps to mastering contouring, identify the best tools and products, explain how to contour based on different face shapes, and highlight common mistakes to avoid. By the end, you’ll have all the knowledge you need to create a defined, sculpted look that enhances your natural beauty.
Step-by-Step Guide: Tools, Techniques, and Product Recommendations
To achieve a beautiful, defined look through contouring, it’s essential to use the right tools, techniques, and products. Below is a comprehensive step-by-step guide to contouring, including the best tools to use, how to apply your products, and recommendations for top-rated products.
- Tools You’ll Need Before you begin contouring, it’s crucial to have the right tools at your disposal. The following tools will ensure precision and smooth application:
- Contour Brush: A contour brush is typically dense and angled, allowing you to apply contour products precisely along the hollows of your cheeks and jawline. It’s important to choose a brush with a firm bristle texture that can pick up and distribute contour products evenly.
- Blending Sponge: A beauty sponge is essential for blending contour products seamlessly into the skin. A damp sponge will help soften any harsh lines, ensuring a natural, airbrushed finish.
- Highlighting Brush: A fan brush or a smaller, flat brush is ideal for applying highlight to areas such as the cheekbones, brow bones, and cupid’s bow.
- Powder and Cream Contour Products: Contour products come in powder, cream, and stick formulations. Powder contour products are best for oily skin, while cream and stick contours work well for dry skin, as they provide more hydration.
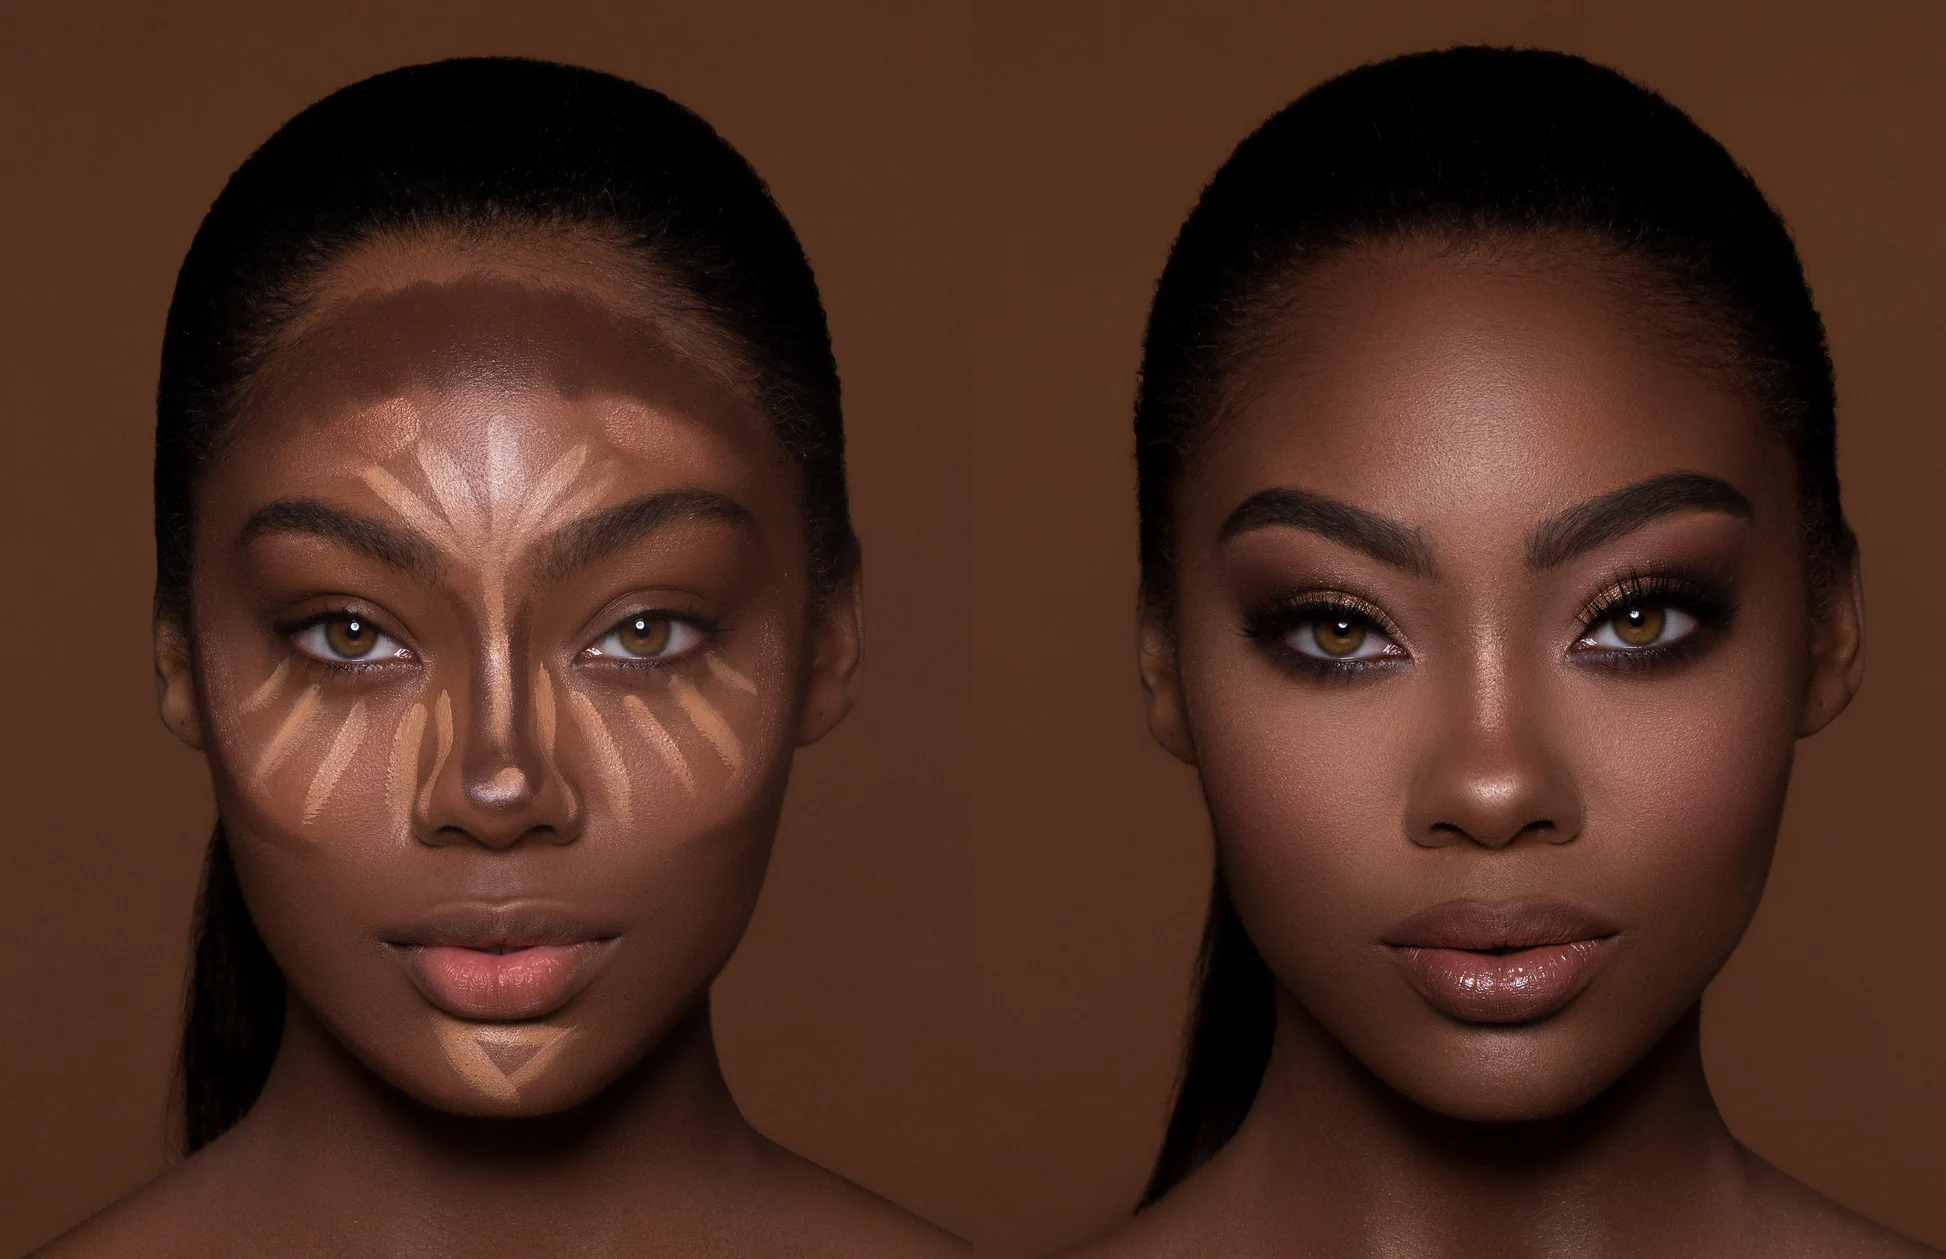
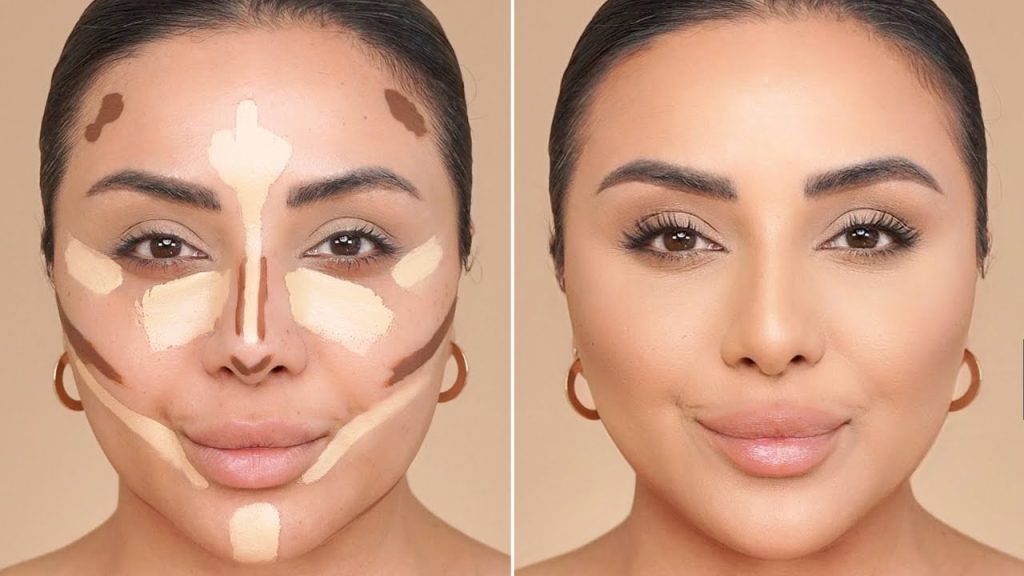
- Applying Contour: The Basic Technique To start, you need to determine where to apply contour and highlight on your face. Contouring generally involves applying a darker shade to the areas of your face that you want to recede or minimize, while highlighting brings forward the areas you want to emphasize.
- Step 1: Start with a well-moisturized face and apply your foundation to create an even base. Make sure your skin is smooth and even-toned before beginning the contouring process.
- Step 2: Use a contour product that is two or three shades darker than your skin tone. Apply contour to the hollows of your cheeks (below the cheekbones), the sides of your forehead, along the jawline, and down the sides of your nose (if you want to create the illusion of a slimmer nose). The idea is to apply contour to areas where shadows would naturally fall, such as underneath the cheekbones and along the temples.
- Step 3: Blend, blend, blend! Use a beauty sponge or contour brush to blend the contour product into your skin. The goal is to create a seamless, shadow-like effect without any harsh lines.
- Step 4: Now, apply your highlight. Use a product that is two or three shades lighter than your skin tone. Apply highlight to the high points of your face, such as the tops of your cheekbones, the bridge of your nose, the center of your forehead, and under your brow bone. Again, blend everything well to ensure a smooth transition between the contour and highlight.
- Step 5: Set everything with a translucent powder to lock your contour and highlight in place. This step ensures your makeup lasts throughout the day and prevents any creasing or shifting.
- Recommended Products Some of the best contour products in the market include:
- Cream Contours: NARS Contour Cream Palette, Anastasia Beverly Hills Contour Cream Kit, Fenty Beauty Match Stix.
- Powder Contours: Benefit Hoola Bronzer, Kat Von D Shade + Light Contour Palette, Too Faced Cocoa Contour Kit.
- Highlighting Products: Becca Shimmering Skin Perfector Pressed Highlighter, Hourglass Ambient Lighting Powder, Maybelline Master Strobing Stick.
Face Shapes and Contouring: Customizing Your Look Based on Face Structure
Not all faces are the same, and contouring should be tailored to your individual face shape. Understanding your face shape will help you apply contour and highlight in the most flattering way. Here’s a breakdown of different face shapes and the contouring techniques that work best for each:
- Oval Face An oval face is considered the ideal shape because it is already well-balanced. To accentuate your natural features, apply contour along the jawline, under the cheekbones, and along the forehead. Keep the rest of the face lightly highlighted to maintain the natural balance.
- Round Face For a round face, contouring aims to create the illusion of more defined cheekbones and a slimmer jawline. Focus contouring on the sides of the cheeks, near the temples, and underneath the jawline. Use highlighter on the center of your forehead, down the bridge of your nose, and on the chin.
- Square Face Square faces have strong, angular features. To soften the sharpness of the jawline, apply contour under the cheekbones and along the sides of the forehead. Avoid contouring the jawline too much to maintain the natural structure.
- Heart-Shaped Face A heart-shaped face features a wide forehead and a pointed chin. To balance this shape, contour the forehead and along the jawline to create symmetry. Highlight the center of the face, especially the cheekbones and chin, to bring attention to the center of your face.
- Long Face If you have a long face, contouring should focus on creating the illusion of width. Contour along the sides of your forehead and cheeks, and avoid contouring too much under the chin. Apply highlighter on the top of the forehead, cheekbones, and chin.
Mistakes to Avoid: Over-Contouring, Using the Wrong Shade
Contouring can be a fun and transformative makeup technique, but it’s easy to make mistakes if you’re not careful. Here are some of the most common contouring mistakes and how to avoid them:
- Over-Contouring One of the biggest mistakes people make is overdoing the contouring. Contouring is meant to create subtle shadows, not dramatic lines. To avoid this, apply contour in light layers and blend thoroughly. Start with a small amount of product and build it up gradually, rather than applying too much at once.
- Using the Wrong Shades The key to natural-looking contouring is using the right shades. Darker contour shades should be just a few shades darker than your natural skin tone, while highlighter shades should be just a few shades lighter. Using too dark of a contour or too light of a highlight can result in an unnatural look.
- Not Blending Well Blending is crucial to contouring. Harsh lines can make the makeup look stark and out of place. Always blend contour and highlight products well into your skin, using either a sponge or brush, until there are no visible lines.
- Contouring Without Considering Face Shape Not every contouring technique works for every face shape. Make sure you understand your face structure and apply contour in the areas that will flatter your features. For example, don’t contour the jawline excessively if you have a square face, or you might create a more angular look.
- Neglecting the Neck and Chest If you’re contouring your face, make sure to extend your contouring routine down to your neck and chest. This ensures that your face blends naturally with the rest of your body, especially if you’re wearing a lower neckline.
Conclusion: Perfecting Your Contouring Skills for a Natural Look
Contouring can seem intimidating at first, but with practice, it becomes second nature. By using the right products, tools, and techniques, you can achieve a beautifully sculpted face that enhances your natural features. The key to successful contouring is subtlety—aim for a natural, defined look rather than a harsh, over-done appearance. Make sure to customize your contouring routine based on your face shape, and always blend your products thoroughly for a seamless finish.
As with all makeup techniques, contouring is an art, and the more you practice, the more comfortable you will become. Whether you’re contouring for a special occasion or just want to enhance your everyday look, mastering the art of contouring will help you create the perfect balance of light and shadow to define your features beautifully.


