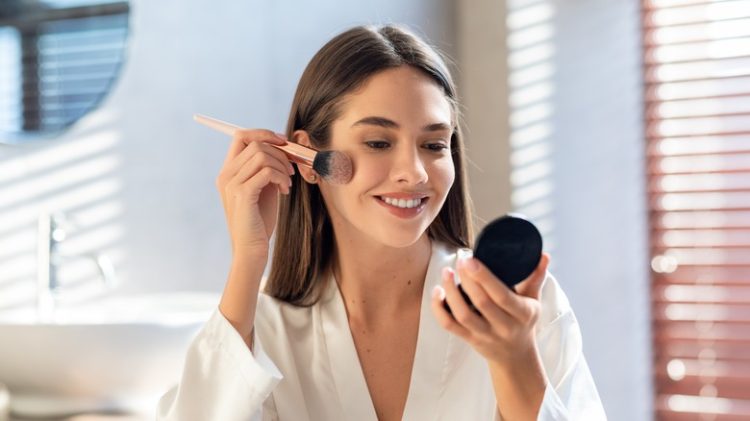
When it comes to applying makeup, tools play a pivotal role in achieving a flawless finish. The two most common tools for applying foundation, concealer, powder, and other makeup products are makeup brushes and makeup sponges (such as the iconic Beautyblender). Both tools have their advantages, and choosing between the two often depends on your skin type, the finish you want, and the type of product you’re using.
So, what’s the difference between makeup brushes and sponges? Which one should you choose, and how should you use them for the best results?
Let’s break it down!
Makeup Brushes vs. Sponges: Key Differences
1. Makeup Brushes:
Makeup brushes come in various shapes and sizes, each designed to suit different makeup techniques and products. Brushes typically have synthetic or natural bristles and are used for applying, blending, and sometimes buffing makeup products onto the skin.
Pros of Makeup Brushes:
- Precision: Brushes offer more control, especially when applying product to specific areas like the eyes, nose, and cheekbones. This makes brushes perfect for detail work like eyeshadow, contouring, or applying highlighter.
- Variety of Styles: Brushes come in different shapes for different purposes. For example, angled brushes are great for contouring, flat brushes are used for foundation, and tapered brushes are ideal for blush or powder.
- Hygiene: Brushes, when cleaned regularly, tend to be more hygienic compared to sponges, as they don’t absorb makeup products as much.
- Suitable for Various Products: Brushes work well for both cream and powder-based products, providing a smoother finish with powder formulas.
- Buildable Coverage: Brushes allow for buildable coverage. You can apply a light layer first and then add more product to achieve the desired coverage.
Cons of Makeup Brushes:
- Streaks: Some brushes, especially foundation brushes, can leave streaks or uneven texture if not blended properly.
- More Time-Consuming: If you’re using multiple brushes for different makeup products, this may take more time to finish your makeup.
- Requires Technique: Brushes require a bit more technique to achieve a seamless finish, especially for liquid or cream products.
2. Makeup Sponges (Beautyblender, etc.):
A makeup sponge is a soft, porous tool, usually made of foam, designed to apply makeup in a smooth, blended manner. The sponge is typically used for liquid and cream products, particularly foundation, concealer, and highlighter.
Pros of Makeup Sponges:
- Flawless Finish: Sponges are renowned for creating a seamless, airbrushed finish. They help blend makeup into the skin without leaving streaks, making them great for foundation application.
- Dewy Look: Sponges tend to create a more dewy, hydrated look. The damp sponge helps in sheer application, which is perfect for those who prefer a more natural, lightweight finish.
- Quick Application: Sponges are often quicker to use than brushes because you can bounce them over the skin to blend product in a matter of seconds.
- Less Product Absorption: Sponges don’t absorb as much product as you might think, especially when used damp. The water content helps prevent waste by ensuring that the product stays on your face instead of soaking into the sponge.
- Versatile: Sponges can be used for various products, from foundation to blush to highlighter, making them a multi-purpose tool.
Cons of Makeup Sponges:
- Absorption of Product: While sponges don’t absorb as much product as one might expect, they can still soak up a certain amount of liquid or cream formulas, meaning you may use more product than with brushes.
- Requires Cleaning: Sponges need frequent cleaning to avoid bacteria buildup, especially since they are damp when used. Regular washing is essential for maintaining hygiene.
- Not Ideal for Powder Products: Sponges tend to work best with cream or liquid formulas. They can absorb powders and leave an uneven finish if used with powder products like blush, contour, or setting powder.

Which Tool Should You Choose?
The decision between brushes and sponges depends on your preferences, the look you’re going for, and your skin type. Here’s a quick comparison:
When to Use a Brush:
- Full Coverage: If you’re looking for full coverage, a brush is your best friend. Brushes can build up product more effectively for a heavier coverage look.
- Precise Application: For areas that need precision, such as the eyes or around the nose, brushes offer better control and definition.
- Powder Products: Brushes are the go-to for applying powders (setting powder, blush, bronzer, etc.) because they won’t soak up the product.
- Texture & Sculpting: Brushes are great for contouring and creating texture. The different types of brushes help sculpt cheekbones, blend eyeshadow, and apply blush with more precision.
When to Use a Sponge:
- Natural & Dewy Finish: If you want a more natural, dewy finish, a sponge is ideal. It helps sheer out products and gives a smooth, airbrushed look.
- Light to Medium Coverage: For a light or medium coverage look, a damp sponge blends product easily, leaving skin looking fresh and glowing.
- Blending Cream & Liquid Formulas: Sponges work beautifully with liquid foundations, creams, and concealers, helping to blend everything seamlessly.
- Quick & Easy Application: If you’re in a rush, a sponge can be a quicker option for blending makeup in a smooth and efficient manner.
How to Use a Makeup Sponge Correctly
Using a makeup sponge properly can make all the difference in the finish you achieve. Here’s how to use it effectively:
- Wet the Sponge: Always dampen your sponge before use. Run it under water and squeeze out any excess. A damp sponge is softer and helps blend the product seamlessly into your skin.
- Apply Foundation: Pour your foundation onto the back of your hand or directly on the sponge. Start by tapping the sponge onto your face using a gentle bouncing motion. This helps distribute the product evenly and prevents streaks. Avoid dragging the sponge, as this can cause uneven application.
- Blend and Build: For more coverage, build up the foundation in layers. Press the sponge into your skin to press the product in for a more natural look.
- Use for Concealer and Highlighter: The sponge can also be used for applying concealer or highlighter. Use the pointed tip to apply concealer under the eyes, around the nose, or on blemishes. You can use the rounded edge to apply highlight on the cheekbones, nose bridge, and forehead.
- Set with Powder: To set your makeup with powder, press a small amount of loose setting powder into the skin using the sponge. This helps lock everything in place and prevents any cakey or patchy areas.
- Clean Regularly: After each use, clean your sponge with mild soap and lukewarm water. Squeeze it gently to remove the product and let it air dry. A clean sponge is crucial for hygiene and better makeup application.
How to Use a Makeup Brush Correctly
Using a brush effectively depends on the type of brush you’re using. Here’s how to use different types of brushes for different makeup products:
- Foundation Brush: Apply foundation directly to the face in small dots, then use the brush to blend it out using circular motions. Start at the center of your face and work your way outward.
- Blending Brush: For eyeshadow, use a fluffy blending brush to apply and blend shades into the crease. Use windshield-wiper motions to blend the colors seamlessly.
- Powder Brush: When applying powder, use a fluffy brush to dust a light layer over your face. Tap off any excess powder before applying to avoid a cakey finish.
- Contouring and Blush Brushes: For contouring, use an angled brush to apply contour powder along the cheekbones, jawline, and forehead. Use a fluffy brush for blush, applying it to the apples of your cheeks and blending upward.
- Cleaning Your Brushes: Just like with sponges, cleaning your brushes is essential. Use a gentle brush cleaner or shampoo to clean your brushes regularly to avoid product buildup and bacterial growth.
Conclusion:
Both makeup brushes and sponges have their advantages, and it ultimately depends on your personal preference and the type of makeup look you want to achieve. Brushes are great for precision, full coverage, and powder-based products, while sponges excel at creating a dewy, natural finish with liquid and cream formulas.
Experiment with both tools to determine which works best for your routine, and remember to clean them regularly for optimal performance. Whether you choose a brush, a sponge, or both, the key is to practice and figure out what gives you the best results based on your skin type and desired look. Happy makeup-ing!

