


The classic swipe of blush on the apples of the cheeks is a thing of the past. In its place, a more sophisticated, skin-enhancing technique has emerged from runways and social media: the 3D Blush trend. This is not merely about adding a pop of color; it’s a strategic approach to placement and hue that mimics the natural, multi-dimensional flush of healthy, radiant skin. Unlike flat, one-dimensional applications, 3D blush creates the illusion of structure, fullness, and vitality, effectively sculpting the face without a drop of contour. But how does one achieve this seemingly effortless, lit-from-within effect without looking overdone or dated?
Mastering this trend requires moving beyond a single product and shade. It demands an understanding of facial topography, a keen eye for color harmony, and a playful approach to texture. This article will deconstruct the 3D blush technique into three core principles: the strategic placement rules that create dimension, the essential undertone harmony that makes the blush look like a natural extension of your skin, and the critical texture balance that brings the entire look to life with a believable, modern radiance.
The Architectural Blueprint: Strategic Placement Rules for Dimension
The foundational principle of 3D blush is that a natural, healthy flush is never a single, monolithic block of color. It occurs in multiple areas of the face where blood naturally rises to the surface—across the bridge of the nose, high on the cheekbones, and even subtly on the brow bone and chin. The 3D technique replicates this phenomenon to create structure and forward projection.
The goal is to visually “pull” the most prominent parts of your face forward, creating a rounded, youthful effect, as if light is naturally hitting the high points. Here’s the strategic blueprint:
- The Anchor Point: The High Cheekbone. Instead of smiling and applying blush to the apples of your cheeks (which can drag the face down when your expression relaxes), start by placing your primary blush color on the highest point of your cheekbone, just below the outer corner of your eye. This immediately creates a lifting effect. Use a fluffy brush to blend the color upwards and backwards, towards your temples, following the line of your cheekbone. This is your structural base.
- The Connector: The “W” or “E” Technique. To emulate a natural, sun-kissed flush that travels across the face, connect the blush from one cheekbone to the other. You can do this in two ways:
- The “W” Technique: After applying to the cheekbones, lightly sweep what’s left on your brush over the bridge of your nose, creating a soft “W” shape. This connects the color in a way that looks incredibly natural and youthful.
- The “E” Technique: For a more focused, editorial look, apply blush in a pattern that resembles a sideways “E”—across the forehead hairline, under the eyes on the cheekbones, and along the jawline/chin. This frames the face with a cohesive wash of color.
- The Highlighting Layer: The Under-Eye and Brow Bone. This is the secret to the “3D” effect. After applying your main cheek color, take a smaller, denser brush and a slightly lighter or brighter shade of blush (or use the same one with a heavier hand) and pat it precisely on the highest point of the cheekbone, just under the outer corner of the eye. Then, for an extra dimension, take a tiny amount of a shimmery, blush-toned highlighter or a sheer luminous blush and tap it onto the center of the apples (now you can smile to find them) and the brow bone. This layering of color and light creates a rounded, protruding effect that flat contour powder could never achieve.
The Color Code: Achieving Undertone Harmony for a Believable Flush
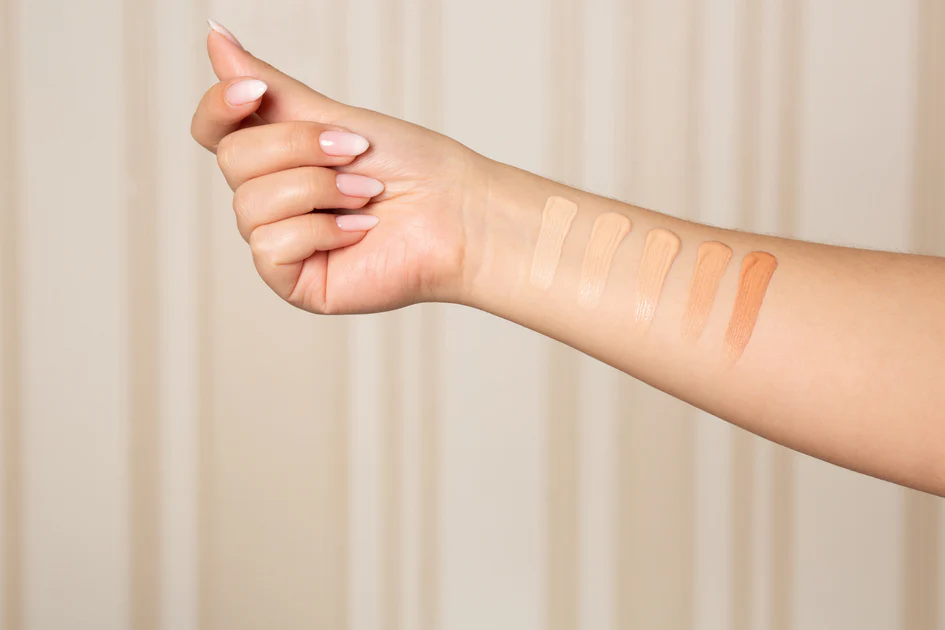
A blush that looks stunning in the pan can look garish or flat on the skin if it clashes with your underlying complexion. The magic of the 3D blush trend lies in its ability to look like your own skin, but better. This is entirely dependent on selecting shades that harmonize with your skin’s undertones.
For Cool Undertones:
If your skin has pink, red, or blueish hints, and silver jewelry typically flatters you more, you should lean towards blushes with a cool base.
- Think: Berry, rose, soft pink, and plum.
- Why it Works: These shades mimic the natural flush of cool-toned skin, looking like a natural bodily reaction rather than a layer of makeup. A berry shade blended across the cheeks and nose can look like a brisk walk in cold air, while a soft rose appears as a natural, delicate flush.
For Warm Undertones:
If your skin has yellow, golden, or peachy hints, and you look better in gold jewelry, your most natural-looking blushes will have a warm base.
- Think: Coral, peach, apricot, and warm terracotta.
- Why it Works: These shades replicate the glow of warm skin in the sun. A peachy coral looks like a natural suntan flush, while a terracotta can emulate a warm, healthy vitality without looking orange.
For Neutral/Olive Undertones:
If you have a mix of warm and cool tones or a greenish-gold cast to your skin, you have more flexibility but need to be wary of shades that pull too pink or too orange.
- Think: Mauve, rosy brown, dusty peach, and neutral pink.
- Why it Works: These shades balance the green and golden notes in olive skin. A mauve provides a natural-looking flush without emphasizing redness, while a rosy brown adds warmth and definition without looking muddy.
The 3D Color Layering Technique:
To truly master the trend, don’t use just one blush. Use two or three within your undertone family. Apply a deeper, more muted tone (like a muted berry for cool tones or a terracotta for warm tones) as your base for structure on the cheekbones and temples. Then, layer a brighter, more saturated version (a bright rose or a vivid coral) on the very high points to create that forward-projected pop of color. This monochromatic layering is the ultimate secret to a complex, dimensional finish.
The Finish Line: Mastering Texture Balance for Modern Radiance
The final, and often most overlooked, component of the 3D blush trend is texture. A flat matte blush will always look like powder sitting on top of the skin. The goal is to have the blush look like it is emanating from within the skin, which requires a thoughtful mix of textures.
- The Cream or Liquid Base: This is non-negotiable for a modern, skin-like finish. Start with a cream or liquid blush formula. These products melt into the skin, blending seamlessly with your foundation or bare skin to create a second-skin effect. They provide a dewy, translucent wash of color that looks authentic. Apply your cream blush after foundation but before powder to prevent patchiness.
- The Powder Lock: To build intensity and longevity without losing dimension, lightly set the cream blush with a powder blush in a similar shade. Use a very fluffy brush and a light hand, pressing—not swiping—the powder onto the areas where you want the most staying power (like the high cheekbone). This “sandwich” technique locks the color in place while maintaining the creamy, skin-like texture underneath.
- The Luminous Finale: The ultimate 3D effect is achieved by introducing a luminous texture. This can be done in two ways:
- Using a Luminous Blush: Incorporate a blush with subtle micro-shimmer or a satin finish into your routine, using it as your highlighting layer on the very high points.
- Layering with Highlighter: As a final step, take a liquid or cream highlighter in a tone that complements your blush (e.g., a champagne highlighter with peach blush, a pink one with berry blush) and tap it onto the very center of the apples of the cheeks, the brow bone, and the tip of the nose. This strategic placement of light-reflective particles makes the skin look plump and hydrated, amplifying the 3D effect.
Conclusion: From a Makeup Technique to a Skin Statement
Mastering the 3D blush trend is about embracing a new philosophy of makeup. It shifts the role of blush from a simple color applicator to a sophisticated tool for sculpting, brightening, and mimicking the beautiful, complex biology of healthy skin. By understanding the architectural placement that creates structure, selecting shades that harmonize with your innate undertones, and balancing creamy, powdery, and luminous textures, you can achieve a radiance that no single product can provide.
This trend empowers you to move beyond covering up and towards enhancing what you have. It’s a celebration of dimension, color, and light, resulting in a complexion that looks vibrantly, believably, and three-dimensionally alive.


