


The smokey eye is the undisputed queen of evening makeup—a timeless, sultry look that exudes confidence and glamour. Yet, for many, it remains an elusive art form, often resulting in a messy, bruised-looking finish rather than a seamless gradient of shadow. The secret to a flawless smokey eye lies not in dramatic color, but in meticulous technique, particularly the art of blending. It’s a process of building depth and dimension layer by layer, transforming your eyes into a captivating focal point. This tutorial deconstructs the smokey eye into its fundamental components, providing a masterclass in color theory, blending wizardry, and finishing touches that will ensure your look is sophisticated, not smudgy, for any evening event.
1. The Chromatic Foundation: Strategic Color Selection for Your Smokey Eye
A smokey eye is not synonymous with black eyeshadow. The choice of color palette sets the entire mood and should complement your eye color, skin tone, and the occasion.
The Classic Neutrals:
- Charcoal and Black: The ultimate, high-drama classic. Best for deep skin tones or those seeking maximum intensity. It can be the most challenging to blend without looking heavy.
- Chocolate Browns: Universally flattering and much more forgiving than black. Ideal for beginners, hazel eyes, and creating a warm, sultry effect. It’s less harsh and provides a softer, more blended look.
- Taupe and Slate Grey: Perfect for fair to medium skin tones and blue or green eyes. It offers a cool, sophisticated smokiness without the potential severity of black.
The Colorful Smolder:
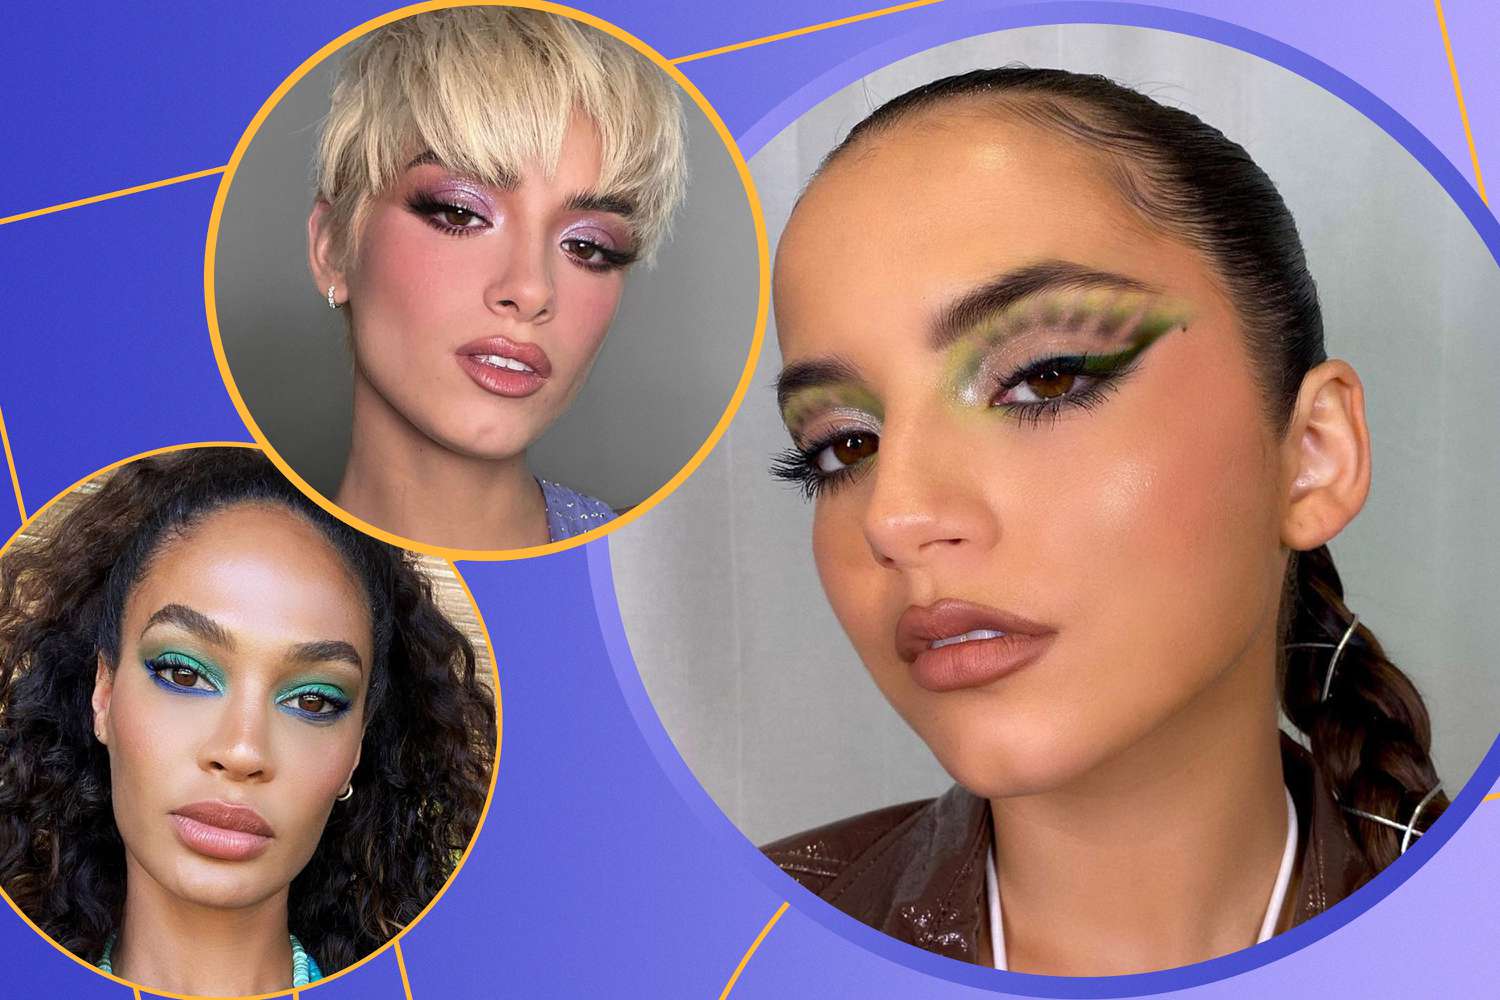
- Deep Plum/Burgundy: Stunning on brown and hazel eyes, making the gold and green flecks pop. It creates a romantic, wine-inspired look.
- Navy Blue or Emerald Green: A bold, modern take on the classic. Navy is incredible on dark brown eyes, while emerald makes blue and green eyes look electrifying.
- Bronze and Copper: These metallic shades create a warm, luminous smokey eye that is perfect for golden hour events and complements all eye colors, especially blue and green.
Building Your Palette:
A successful smokey eye requires a minimum of three shades from the same color family:
- The Base/Lid Color: A medium-toned shade that will be packed onto the mobile lid.
- The Crease/Transition Shade: A matte shade slightly darker than your skin tone. This is your “blending buffer,” crucial for creating a seamless gradient between your lid color and your brow bone.
- The Darkener/Definer: The darkest shade (e.g., deep brown, black, plum) used to add depth at the outer corner and along the lash line.
2. The Blending Ballet: Techniques for a Seamless, Airbrushed Gradient
Blending is the heart and soul of the smokey eye. This is where a look transforms from amateurish to professional.
The Pro Technique: Layering and Diffusing
- Prime the Eyelids: Start with an eyeshadow primer or a dab of concealer set with powder. This creates a sticky, even base that prevents creasing and makes shadows appear more vibrant.
- Apply the Transition Shade First: With a fluffy, tapered blending brush, sweep your matte transition shade back and forth in a gentle “windshield wiper” motion through the crease. Extend it slightly above your natural crease to visually lift the eye. This creates a soft, diffused base for the darker colors to blend into.
- Pack on the Lid Color: Using a flat shader brush or your finger, press the medium-toned lid color onto the center of your mobile lid, from the lashline up to the crease. Do not blend the top edge yet.
- Deepen the Outer Corner (The “V”): With a smaller, denser pencil brush, apply the darkest shade to the outer third of the eye, focusing on shaping a sideways “V” that follows your lower lashline up and out. Keep this color concentrated.
- The Grand Blending Finale: This is the critical step. Go back to your clean, fluffy blending brush. Without picking up any new product, use light, circular motions to blend the edges where the dark outer “V” meets the lid color and the transition shade. The goal is to erase any harsh lines, creating a soft, smoky gradient. If needed, you can dip the very tip of your brush into the transition shade to help blend further.
The Golden Rule: Blend, Then Blend Again. You can never over-blend.
3. The Defining Lines: Eyeliner and Mascara for Maximum Impact
Eyeliner and mascara are the structural supports that define the smokey eye, preventing it from looking like a vague, shapeless wash of color.
Eyeliner: The Smudged, Smoky Line
Forget a sharp, precise wing. The goal here is a soft, kohl-rimmed effect.
- Pencil is King: Use a soft, creamy kohl or pencil eyeliner in black or brown. Gel liner can also be smudged for a more intense look.
- Tightline: Gently line your upper waterline to darken the lash base, making lashes appear thicker.
- Smudge, Don’t Draw: Press the liner along your upper and lower lash lines. Then, immediately use a small, stiff smudger brush or a cotton swab to smudge and soften the line, making it part of the shadow itself. For the lower lashline, apply the pencil and then go over it with your dark definer eyeshadow on a pencil brush to seamlessly integrate it.
Mascara: The Final Frame
- Curl Your Lashes: Always curl your lashes before applying mascara to open up the eyes.
- Wiggle and Coat: Apply 2-3 coats of a volumizing mascara, wiggling the wand from the very root of the lashes to the tips. Ensure you coat every lash.
- The False Lash Option: For ultimate drama, apply a pair of wispy, individual or strip false lashes. They complete the look by adding a structural frame that enhances the smokey effect.
4. The Lock and Load: Setting Your Masterpiece for All-Night Wear
A smokey eye has more moving parts than a typical look, making setting crucial to prevent fallout, smudging, and fading.
The Clean-Up:
After the intense blending, there is likely to be eyeshadow fallout under your eyes.
- The Powder Method: Before you start your eye makeup, generously apply a loose, translucent powder under your eyes. When you’re finished, simply brush the powder away, and the fallout will go with it.
- The Tape Trick: Place a piece of scotch tape (sticky-side down on your hand first to reduce tack) from the outer corner of your eye towards the end of your brow. This creates a sharp, clean line and catches all fallout.
Setting the Look:
- Conceal and Brighten: After cleaning up fallout, apply a brightening concealer in a triangular shape under your eyes and blend seamlessly. This sharpens the look and makes the eyes pop.
- Set the Undereye: Lightly set the concealer with a tiny amount of translucent powder to prevent creasing.
- The Final Seal: Hold a tissue over your closed eyes and mist a makeup setting spray over your entire face. The tissue protects the eye makeup from getting disrupted by the direct spray, while still allowing the fixative to lock everything in place.
Evening-Proofing Tips:
- Carry a cotton swab in your clutch for quick, precise clean-up if any smudging occurs.
- Avoid touching or rubbing your eyes throughout the night.
Mastering the smokey eye is a rite of passage in the world of beauty. It’s a look that commands attention and radiates confidence. By strategically selecting your color story, dedicating time to the meditative process of blending, defining the eyes with soft, smudged liner and lush mascara, and meticulously setting the final look, you transform a potentially messy technique into a wearable work of art. Remember, the perfect smokey eye isn’t about perfection; it’s about a perfectly executed imperfection—a soft, blended, and utterly captivating smolder.


