


The smokey eye is one of the most iconic and versatile makeup looks, perfect for evening events, photoshoots, or adding drama to everyday makeup. While it can appear intimidating, mastering a smokey eye is achievable with the right techniques, shade selection, and careful blending. This guide will provide a step-by-step approach for beginners, covering everything from choosing shades and blending properly to applying eyeliner and mascara, as well as common mistakes to avoid.
1. Shade Selection: Choosing the Right Colors
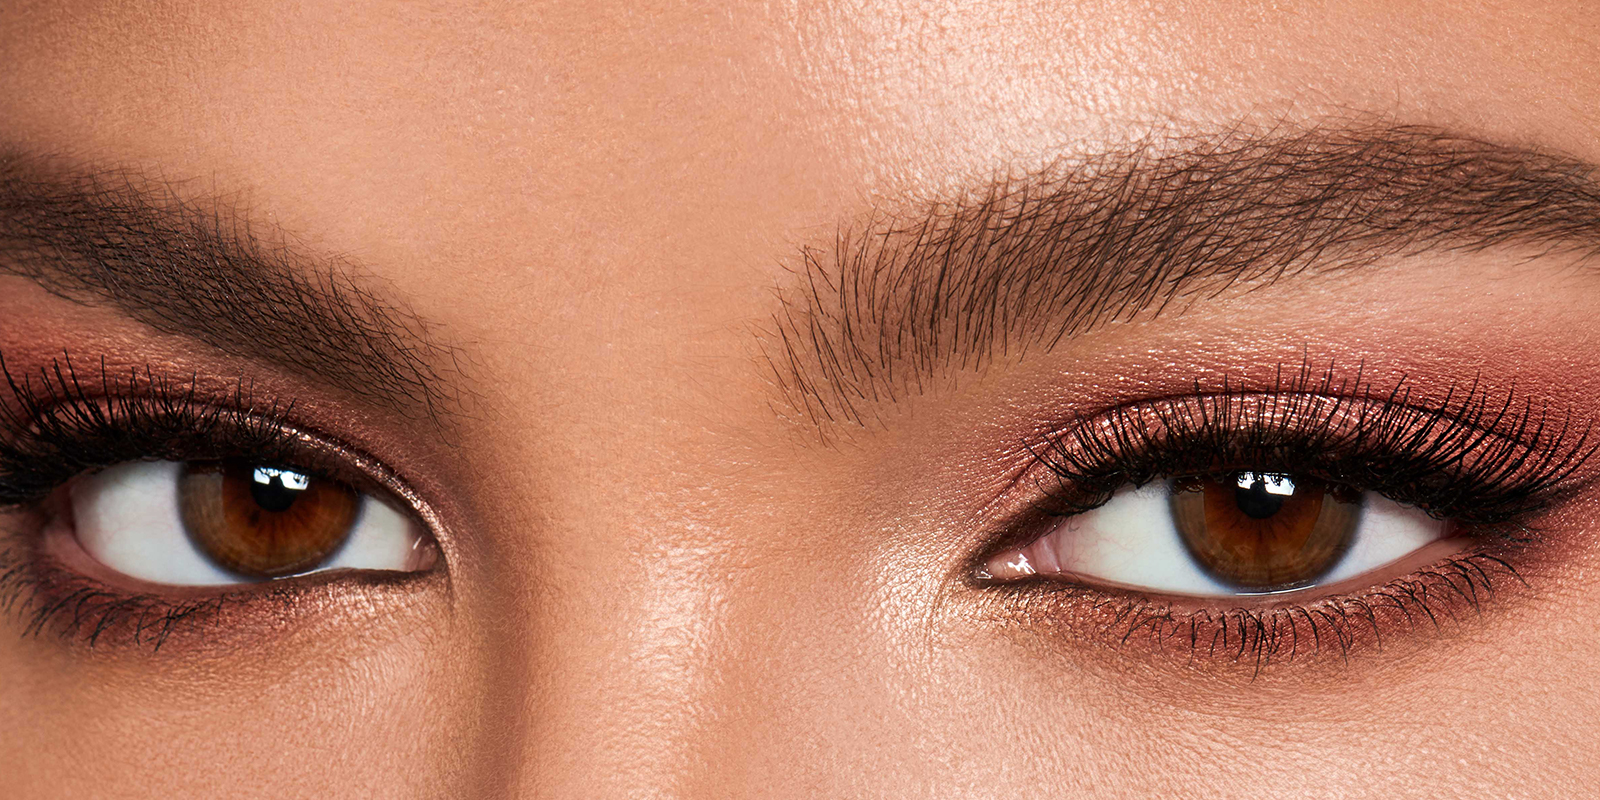
Selecting shades is the foundation of a successful smokey eye.
1.1 Basic Smokey Palette for Beginners
- Base Shade: Neutral nude or soft beige applied all over the lid as a canvas.
- Transition Shade: Medium brown or taupe to create gradient effect in the crease.
- Dark Shade: Deep black, charcoal, or dark brown for outer corners and lash line.
- Highlight Shade: Shimmery champagne or light pearl for the brow bone and inner corner.
Tip: Beginners should start with softer contrasts—using medium and dark browns—before moving to black for a classic smokey effect.
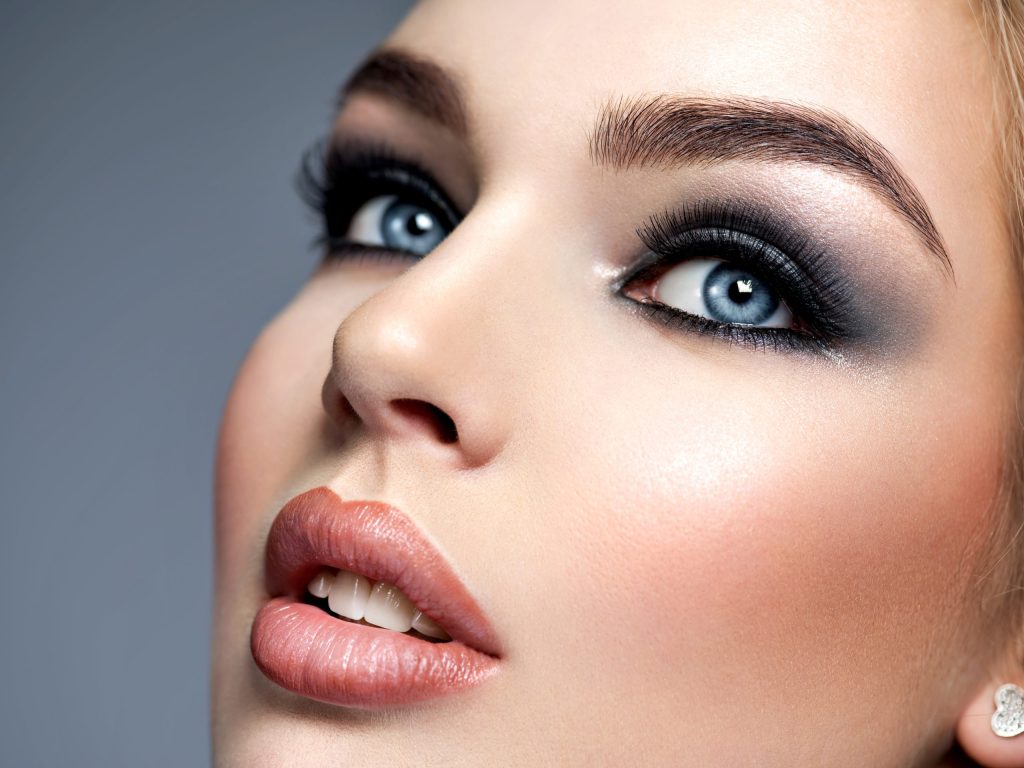
1.2 Matching Shades to Eye Color
- Blue Eyes: Bronze, copper, and warm browns enhance the blue tones.
- Green Eyes: Plum, mauve, and chocolate shades complement green.
- Brown Eyes: Almost any shade works, but cool greys and deep purples create dramatic contrast.
2. Blending Techniques: The Key to a Flawless Smokey Eye
Blending is what separates a beginner look from a polished smokey eye.
2.1 Tools You Need
- Fluffy blending brush for crease
- Dense eyeshadow brush for lid
- Small angled brush for lower lash line
2.2 Step-by-Step Blending Process
- Prime the eyelid: Use an eyeshadow primer to prevent creasing and enhance pigment.
- Apply base shade: Sweep a neutral nude across the entire eyelid.
- Add transition shade: Use a fluffy brush to apply medium brown into the crease in windshield-wiper motions.
- Apply dark shade: Pat the dark color onto the outer corner and blend inward, building intensity gradually.
- Blend edges: Use a clean brush to soften any harsh lines between shades for a seamless gradient.
- Highlight: Apply light shimmer to brow bone and inner corner to open up the eyes.
Pro Tip: Always build color slowly. Applying too much dark shade at once can make blending difficult.
3. Eyeliner and Mascara
Eyeliner and mascara define the eyes and intensify the smokey effect.
3.1 Eyeliner
- Use black or dark brown pencil or gel liner for beginners.
- Tightline the upper waterline to create depth.
- Smudge eyeliner along the upper and lower lash lines for a smoky effect using a small brush or smudging tool.
Tip: Avoid harsh lines; soft smudging enhances the smokey look.
3.2 Mascara
- Apply volumizing mascara to upper and lower lashes.
- Wiggle the wand at the base of lashes and pull through for maximum lift.
- Optional: Add false lashes for extra drama once comfortable with technique.
4. Cleaning Mistakes to Avoid
Beginners often make errors that can sabotage a smokey eye look.
4.1 Over-Blending or Under-Blending
- Over-Blending: Can cause colors to lose intensity.
- Under-Blending: Leads to harsh lines that appear messy.
- Solution: Blend in layers and check progress frequently.
4.2 Fallout
- Dark shadows often leave pigment on the cheeks.
- Apply translucent powder under eyes before shadow, or do eyes first, then face makeup.
4.3 Too Much Product at Once
- Applying excessive eyeshadow in one go creates patchiness.
- Always start with a small amount and build gradually.
4.4 Ignoring Eye Shape
- Smokey techniques vary based on eye shape:
- Hooded Eyes: Focus dark shades slightly above crease.
- Monolids: Use gradient effect and avoid heavy outer corners only.
- Almond Eyes: Balanced outer and inner corner shading works best.
5. Step-by-Step Beginner Smokey Eye Routine
- Prep with eye primer.
- Apply base shade across the eyelid.
- Use transition shade in crease and blend.
- Pat dark shade onto outer corner and lower lash line.
- Blend edges softly.
- Highlight brow bone and inner corner.
- Apply eyeliner on upper and lower lash lines; smudge slightly.
- Curl lashes and apply mascara.
- Optional: Add false lashes.
- Clean any fallout under eyes with a makeup wipe or concealer.
6. Tips for Practicing Smokey Eyes
- Start with neutral tones before experimenting with bold colors.
- Practice blending on the back of your hand to understand pressure and motion.
- Use tape or a makeup shield to create crisp outer edges if needed.
- Record or take pictures of each attempt to track improvement.
7. Conclusion: Can Beginners Master the Smokey Eye?
Absolutely! While the smokey eye may seem intimidating initially, with proper shade selection, blending techniques, and careful application of eyeliner and mascara, beginners can achieve professional-looking results. Avoiding common mistakes like fallout, harsh lines, and overloading product will ensure a smooth learning curve. With consistent practice, anyone can perfect a smokey eye that’s versatile, dramatic, and flattering for all occasions.


