


The smokey eye is a classic makeup look that’s perfect for any occasion—whether you’re heading to a glam night out, a special event, or just want to elevate your everyday makeup. Its versatility allows you to play with different shades, from sultry dark blacks to playful and colorful tones. Mastering the smokey eye technique can take your makeup game to the next level, and with a little practice, you can achieve a flawless, smoldering look.
In this step-by-step tutorial, we’ll walk you through the process of creating the perfect smokey eye, from prep to finish. Whether you’re a beginner or an experienced makeup enthusiast, this guide will help you nail this timeless eye makeup look.
1. Start With a Clean Base
Before diving into your smokey eye, it’s important to start with a clean, well-moisturized face. The eyes are the focal point of this look, so a solid base ensures that your makeup stays in place all day (or night) without creasing or smudging.
Why It Matters:
- Smooth surface: A clean canvas helps your eyeshadow blend better and last longer.
- Hydration: Moisturizing ensures your eyelids stay hydrated, which can prevent creasing, especially if you have dry skin.
What You Need:
- Eye cream: Hydrate the delicate skin around your eyes to prevent dryness and puffiness.
- Eye primer: An eye primer helps your eyeshadow stay put and creates a smooth surface for easy blending.
Tip:
- Avoid applying heavy foundation on your eyelids as this can cause creasing. Stick to a light layer of primer or concealer for a flawless finish.
2. Apply an Eyeshadow Primer
To ensure your smokey eye stays intact and vibrant all day, you’ll want to apply an eyeshadow primer. This will prevent the eyeshadow from fading, creasing, or smudging. It also helps the eyeshadow adhere better, providing an even base for blending.
Why It Matters:
- Improved longevity: Eyeshadow primers extend the wear of your makeup, especially for long-lasting looks like the smokey eye.
- Enhanced pigmentation: A primer makes your eyeshadow colors appear more vivid and intense.
What You Need:
- Eyeshadow primer: Use a light, neutral primer to match your skin tone or a colored one that complements your eyeshadow.
Tip:
- Make sure to blend the primer well across the entire eyelid to create a smooth, even canvas.
3. Choose Your Eyeshadow Shades
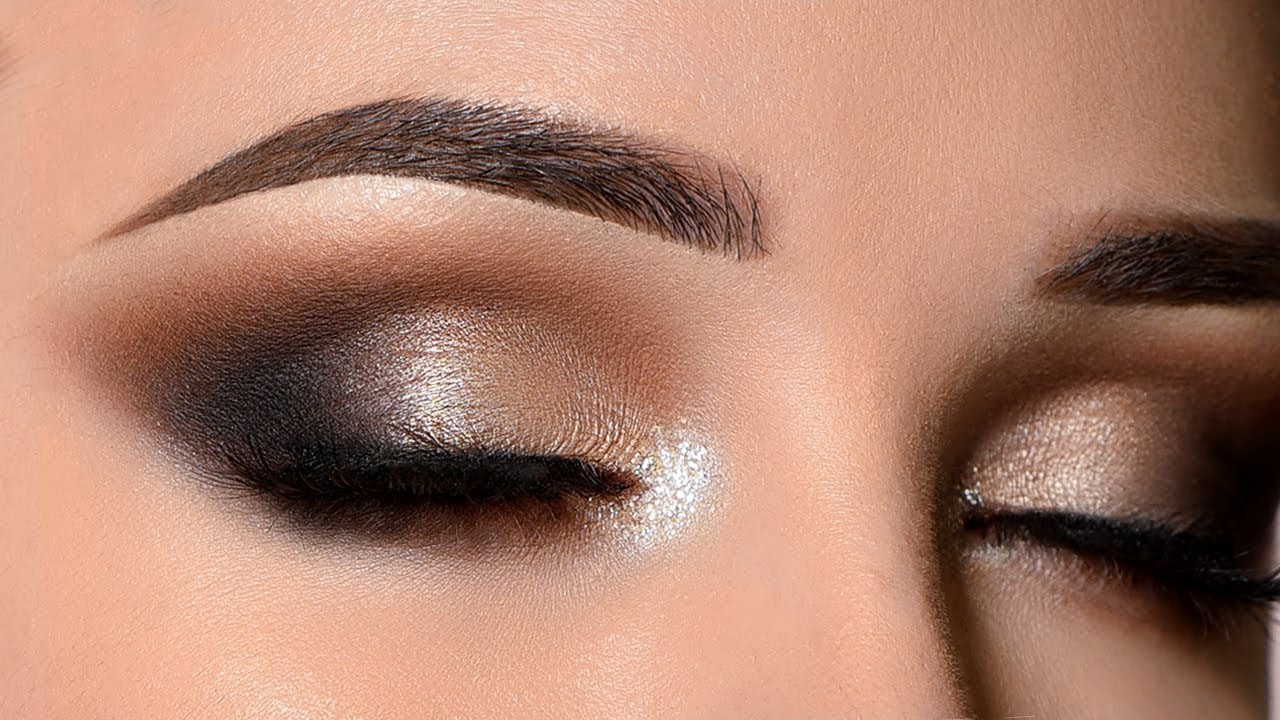
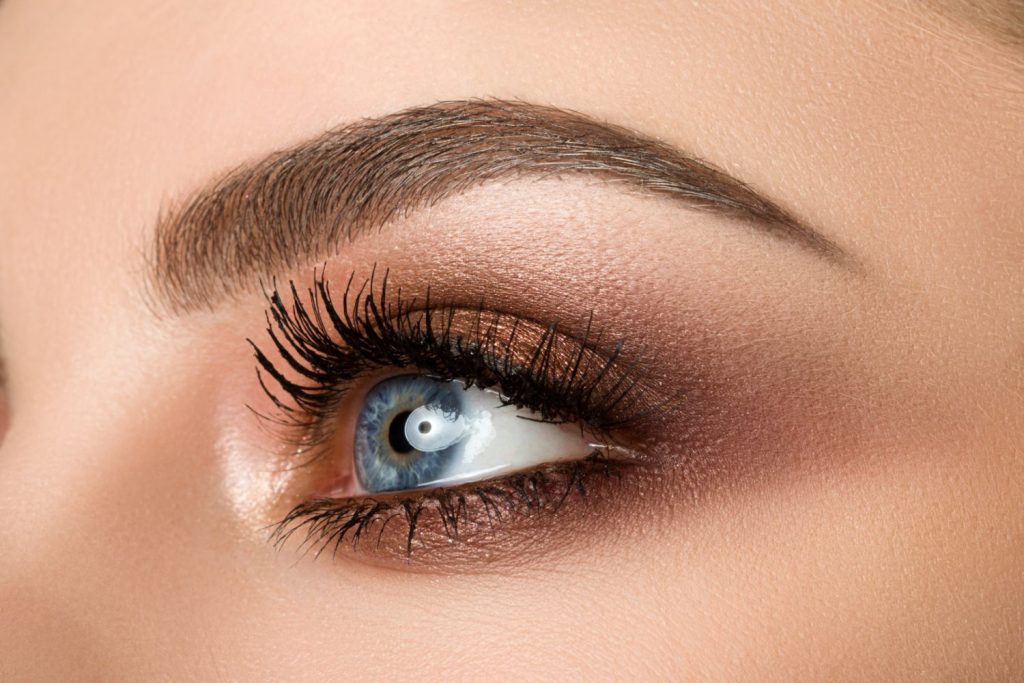
The smokey eye look is defined by its gradient of dark-to-light shades, which creates depth and drama. The most common approach is to use dark shades near the lash line and gradually blend lighter shades toward the crease and brow bone.
Suggested Colors:
- Base color: A neutral shade like beige, soft brown, or taupe for the lid.
- Mid-tone shade: A medium brown or bronze to add depth.
- Smokey shade: A dark color like black, charcoal, or dark brown for the outer corners and lower lash line.
Tip:
- You can play with different hues, such as purples, greens, or blues, for a unique twist on the classic smokey eye look.
4. Create a Neutral Base for the Lid
Using your base color, start by applying a neutral shade all over your eyelid. This helps create a solid foundation for the darker shades and also serves to brighten up the eye.
Why It Matters:
- Even canvas: A neutral base ensures that your darker shades will blend seamlessly without uneven patches.
- Prevents creasing: A base color also helps to keep the lid from getting oily, which can cause the shadow to crease.
What You Need:
- Flat eyeshadow brush: To apply the base color evenly across the entire lid.
Tip:
- Apply the neutral shade from the lash line up to the crease for full coverage.
5. Apply the Mid-tone Shade to the Crease
Next, use a medium-toned shade to define the crease of your eyelid. This will add depth and dimension to the eyes, which is essential for creating that classic smokey effect. Focus on blending the shadow well to avoid harsh lines.
Why It Matters:
- Create depth: Adding a mid-tone color to the crease gives your eyes a more sculpted and dimensional look.
- Smooth transition: This shade will help to seamlessly transition from the lighter base to the darker shades.
What You Need:
- Crease brush: A fluffy brush with a tapered shape works best to apply and blend the crease shade.
Tip:
- Apply the mid-tone shade in a windshield wiper motion across the crease, blending it slightly above the crease to create a soft transition.
6. Define the Outer Corners with a Darker Shade
The key to a smokey eye is the dark outer corner, which creates the dramatic, sultry look. Use a dark shadow, such as black, charcoal, or dark brown, and apply it along the outer third of your eyelid. Then, blend the shadow toward the crease.
Why It Matters:
- Smoky effect: The dark shadow at the outer corner adds intensity and creates that signature smokey look.
- Emphasizes the eyes: Darker shades help bring attention to the eyes, making them appear larger and more defined.
What You Need:
- Small, dense brush: This helps apply the dark shadow precisely without it spreading too far.
Tip:
- Build up the dark shade gradually, adding more product until you reach your desired intensity.
7. Blend, Blend, Blend!
Blending is the most crucial step to achieving a seamless smokey eye. You want to ensure there are no harsh lines, and the shadows transition smoothly from light to dark. Use a clean, fluffy blending brush to buff out any edges and create a soft gradient effect.
Why It Matters:
- Seamless transition: Blending ensures the different shades of eyeshadow mesh together, creating the smokey gradient.
- Smooth, professional finish: Proper blending is the difference between a messy and a flawless smokey eye.
Tip:
- Spend time blending to make sure the colors transition smoothly, and use a circular motion to soften any harsh lines.
8. Apply Eyeliner and Mascara
No smokey eye is complete without eyeliner and mascara. Use a black eyeliner pencil or gel liner to line your upper and lower lash lines. For a softer look, you can smudge the eyeliner with a brush for a more dramatic, smudged effect. Finish with a few coats of mascara to add volume and length to your lashes.
Why It Matters:
- Liner defines the eyes: Eyeliner defines the shape of your eyes and adds to the intensity of the smokey look.
- Mascara opens the eyes: Mascara gives your lashes volume and curl, making your eyes look more awake and enhanced.
What You Need:
- Gel or pencil eyeliner: For precise or smudged liner.
- Volumizing mascara: To add length and fullness to your lashes.
Tip:
- If you want a more intense look, consider using a falsies for added drama.
9. Highlight the Inner Corners
To make your eyes appear more awake and bright, apply a subtle shimmer or light shade to the inner corners of your eyes. This adds contrast to the dark smokey eye and opens up your gaze.
Why It Matters:
- Brightens the eyes: Highlighting the inner corners makes your eyes look more awake and adds a touch of glam to your look.
- Balances the darkness: The light color creates a nice contrast to the darker outer corners, making the smokey effect even more striking.
What You Need:
- Shimmery eyeshadow: Use a light champagne, gold, or pearl shade.
- Small brush: Apply the shimmer precisely to the inner corners.
10. Final Touches: Clean Up and Set
After you’re happy with the eyeshadow, it’s time to clean up any fallout under the eyes and set your look. Use a makeup wipe or cotton pad to remove any excess eyeshadow beneath your eyes, and then apply a little concealer to brighten the area. Finally, set everything in place with a setting spray to lock in your look for hours.
Why It Matters:
- Crisp, clean lines: Cleaning up fallout ensures your under-eye area remains sharp and polished.
- Long-lasting wear: Setting your makeup ensures it stays in place all day or night without smudging or fading.
Tip:
- Use a translucent powder under your eyes before doing your eyeshadow to catch any fallout. Then, brush it off afterward.
Conclusion: Flawless Smokey Eye Every Time
Creating the perfect smokey eye is all about layering and blending. With these step-by-step instructions, you can create a stunning, smoky look that’s perfect for any occasion. From choosing the right shades to mastering blending techniques, this classic eye makeup style is always in vogue and can be adapted to suit any eye shape or color.
With a little practice, you’ll be able to create a smokey eye that’s both sultry and flawless, adding that extra touch of drama and elegance to your makeup routine.


