


Contouring has become a must-know makeup technique for those looking to enhance their facial features. When done correctly, contouring can define your face shape, accentuate your best features, and create a more sculpted, polished look. Whether you’re preparing for a special event or just want to perfect your everyday makeup routine, learning how to contour can elevate your beauty game.
This ultimate guide to contouring for beginners will walk you through the basics, the tools you’ll need, and step-by-step instructions to achieve a flawless, sculpted look.
1. Understanding Contouring Basics
Before diving into the actual process of contouring, it’s important to understand what contouring is and how it works. Essentially, contouring involves using makeup to create shadows and highlights on the face to shape and define features. It’s a technique that mimics the play of light and shadow to emphasize your bone structure, giving you a more defined and sculpted look.
Why It Matters:
- Creates dimension: Contouring enhances your face’s natural structure by adding depth and shadow.
- Enhances features: Contouring helps accentuate features like your cheekbones, jawline, and nose.
Key Components:
- Contour: A matte, darker product used to create shadows and define areas of the face.
- Highlight: A light, often shimmery product applied to areas you want to bring forward and make more prominent.
2. Gather Your Contouring Tools
To contour effectively, you’ll need the right tools. While contouring doesn’t require a lot of fancy equipment, having the proper tools will make the process much easier and help you achieve more precise results. Here’s what you’ll need:
Contouring Products:
- Contouring powder or cream: Choose a matte product that’s a few shades darker than your skin tone to create shadows.
- Highlighter: This can be a powder, liquid, or cream formula, but it should be lighter than your skin tone and give off a subtle glow.
- Bronzer (optional): Bronzer can be used to add warmth to your face and subtly enhance the contour.
Tools:
- Contour brush: A brush with angled bristles is ideal for applying contour precisely to the hollows of your cheeks and jawline.
- Highlighting brush: A fan-shaped brush or a flat brush is best for applying highlighter to the high points of your face.
- Beauty sponge: A damp makeup sponge can help blend both contour and highlight seamlessly into the skin.
Tip:
- Makeup sponges and angled brushes are ideal for beginners because they make blending easier and more foolproof.
3. Prep Your Face
As with any makeup routine, it’s important to start with a clean, moisturized face. Contouring over dry or uneven skin can result in patchy makeup and can make the contour lines look harsh.
Why It Matters:
- Smooth canvas: A well-prepped face allows makeup to blend easily and look more natural.
- Longer-lasting makeup: Proper prep ensures that your contour will last longer and stay intact throughout the day.
What You Need:
- Moisturizer: Hydrate your skin with a lightweight moisturizer to ensure a smooth base.
- Foundation: Apply your usual foundation to even out your complexion and create a flawless base for contouring.
- Concealer (optional): If needed, apply concealer to cover any blemishes, dark circles, or redness.
Tip:
- If you have oily skin, consider using a mattifying primer to keep your makeup in place throughout the day.
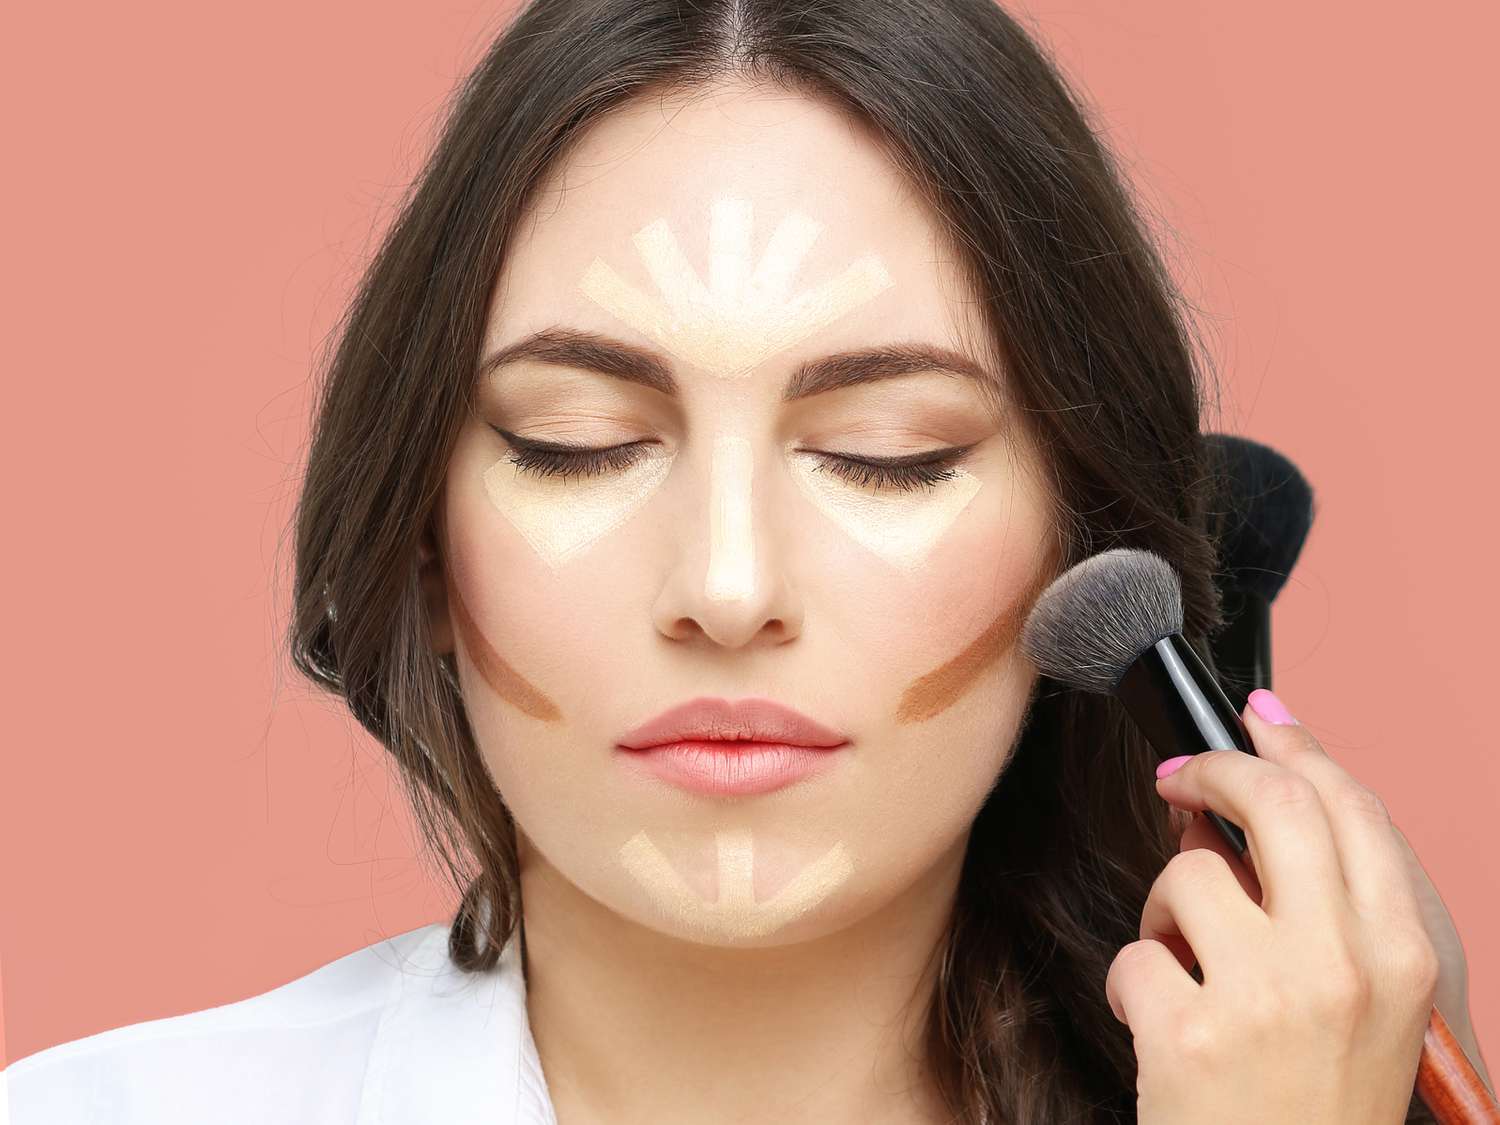
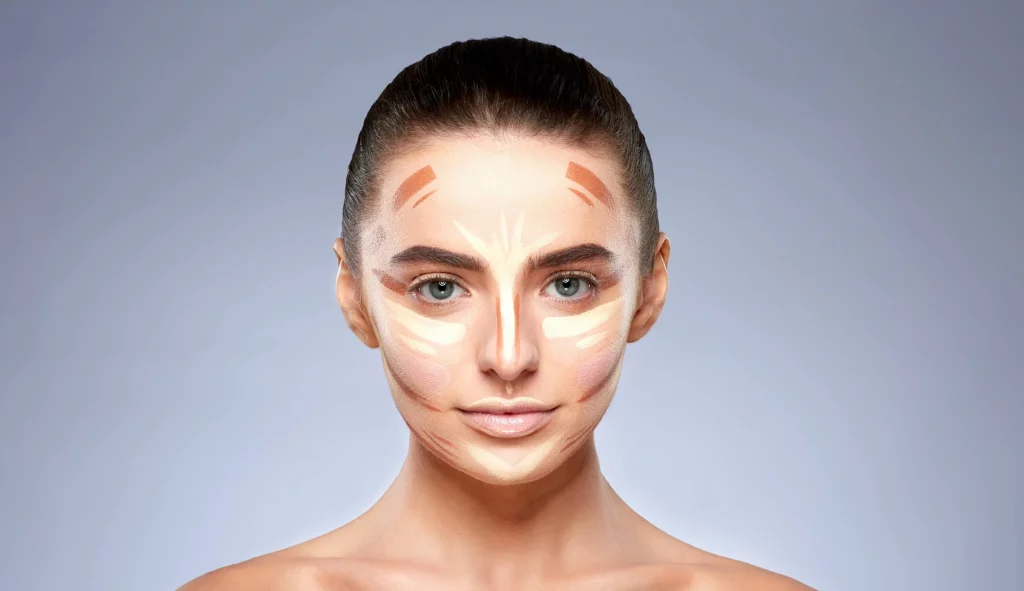
4. Map Out Your Contour Zones
Before applying any makeup, it’s important to know exactly where to place your contour and highlight. While everyone’s face shape is different, there are general guidelines that you can follow.
Key Contour Zones:
- Cheekbones: To sculpt your cheekbones, apply contour in the hollows of your cheeks (just below your cheekbones).
- Jawline: Apply contour along the jawline to define it and create a more chiseled look.
- Nose: Contouring your nose can help make it appear slimmer or more defined.
- Forehead (optional): If you have a larger forehead, you can apply contour along the hairline to make it appear smaller.
Key Highlight Zones:
- Top of the cheekbones: Highlight the tops of your cheekbones to make them stand out.
- Down the center of the nose: Apply highlight to the bridge of your nose to create the illusion of a slimmer nose.
- Cupid’s bow: Highlight the center of your upper lip to make your lips look fuller.
- Center of the forehead and chin: Apply a touch of highlight to the center of your forehead and chin to bring light to these areas.
Tip:
- Use a contour map: If you’re new to contouring, try drawing out the contour and highlight areas with a makeup pencil or light product before blending.
5. Apply Contour and Highlight
Now that you know where to place your contour and highlight, it’s time to start applying the products. Start with your contour first to add definition, and then apply your highlighter to bring light to the high points of your face.
Step-by-Step Application:
- Contour: Using your contour product (cream or powder), apply it in the hollows of your cheeks, along your jawline, and around the perimeter of your forehead. Blend well to avoid harsh lines.
- Highlight: Use your highlighter to accentuate the tops of your cheekbones, the bridge of your nose, your cupid’s bow, and the center of your forehead and chin.
Tip:
- Apply contour in layers, starting with a light amount and building up until you achieve the desired intensity. Less is more when it comes to contouring, especially for beginners.
6. Blend, Blend, Blend
Blending is one of the most important steps when contouring. Blending ensures that the contour and highlight look seamless, so they don’t appear as harsh lines on your face. The key to a natural-looking contour is making sure everything is well-blended.
Why It Matters:
- Seamless look: Blending helps to avoid harsh lines and creates a more natural finish.
- Flawless finish: Proper blending ensures that your contour doesn’t look streaky or uneven.
How to Blend:
- Use a beauty sponge or a blending brush to gently buff the contour and highlight into your skin. Make sure to blend contour products upward into the hairline and blend highlighter products into your foundation.
- For the nose contour, use a small blending brush or sponge to gently buff out the contour for a natural look.
Tip:
- Don’t over-blend: While blending is important, don’t overdo it. The contour should still be noticeable, even though it should look natural.
7. Set Your Makeup
To ensure that your contour lasts all day, set your makeup with a translucent powder. This will help lock in your foundation and prevent your contour from fading.
Why It Matters:
- Long-lasting makeup: Setting your makeup ensures that everything stays in place and doesn’t slide off throughout the day.
- Prevents shine: If you have oily skin, setting with powder can help control shine and keep your contour looking fresh.
What You Need:
- Setting powder: Use a lightweight, translucent powder to set your foundation and contour.
- Setting spray (optional): A setting spray can be applied after the powder to help everything melt into the skin and last longer.
8. Finish the Look
After contouring and setting your makeup, complete the rest of your look by adding blush, mascara, and lip color. Blush will add a healthy flush to your cheeks and balance out the sculpted look of your contour.
Why It Matters:
- Balanced look: Adding blush, mascara, and lip color finishes the look and ensures that your makeup looks cohesive.
- Natural glow: Don’t forget to apply a bit of highlighter to the high points of your face for that radiant, glowing finish.
Tip:
- For a fresh and natural look, use a peach or pink blush that complements the contour shades. A nude lipstick will also help complete the sculpted look.
Conclusion: Perfecting the Art of Contouring
Contouring may seem intimidating at first, but with the right tools, a little practice, and a solid understanding of your face shape, you can master this technique in no time. By following this step-by-step guide, you’ll be able to create a sculpted, defined look that enhances your features and elevates your makeup routine.
Remember, contouring is all about enhancing your natural bone structure, so don’t be afraid to experiment with different products and techniques until you find what works best for you. Happy contouring!


